How to Upgrade or Downgrade Your MageNative Plan?
If you are wondering whether you can upgrade or downgrade your MageNative plan, let us assure you – yes, you definitely can!
In this guide, we are going to give you a step-by-step walk-through on how to change your MageNative plan.
Step-by-Step Guide
1. Log in to your Shopify admin panel.
2. From the left-side menu bar, click on “Sales Channel” and select “MageNative – Mobile App Builder”.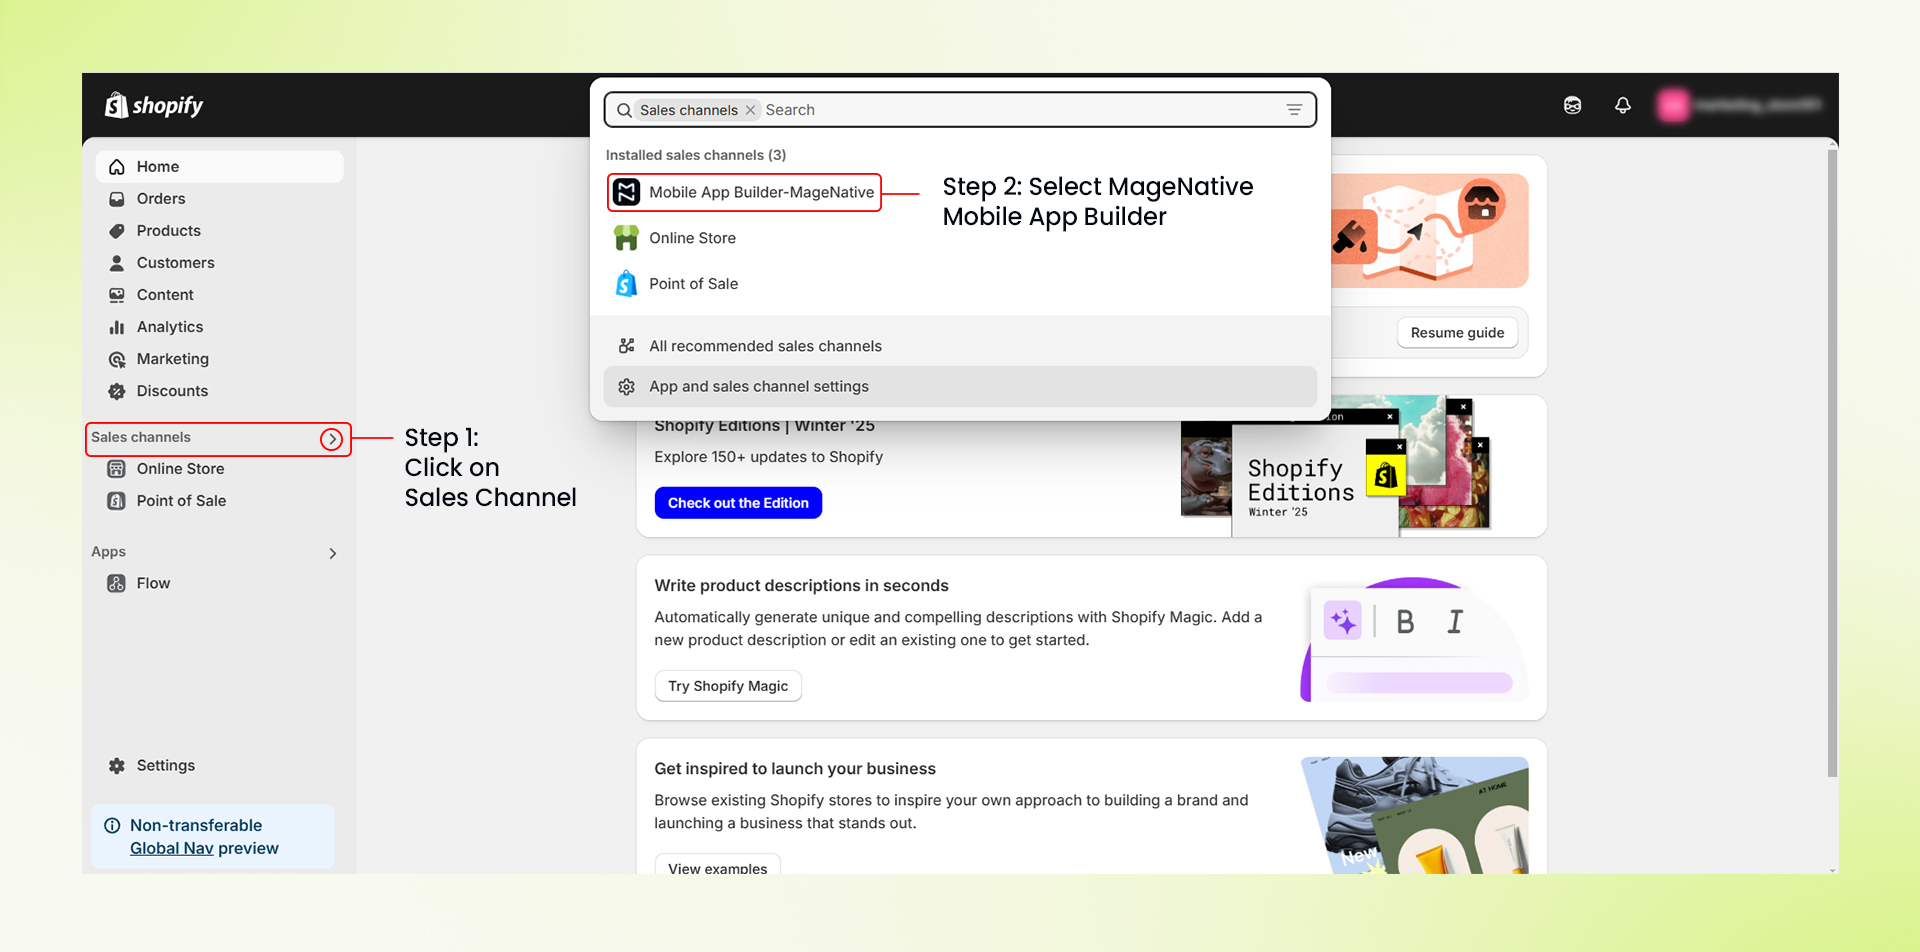 3. Inside your MageNative Dashboard, select ‘Pricing Plan’ from the left menu bar. It will redirect you to a pricing page.
4. Review the available plans and select the one that best matches your needs to upgrade or downgrade. These are the plans available:
- STARTER: $99/mo (15 Design Blocks, App-only Offers, 5 Push Notifications)
- STANDARD: $149/mo (25 Design Blocks, 5 Landing Pages, Multi-Language & Currency)
- PREMIUM: $249/mo (20 Landing Pages, Advanced App Analytics, Unlimited Push Notifications)
- CUSTOM: Let’s Talk (Custom Integration, Unlimited Landing Pages, Sell Globally – Multiple Shopify Stores in a Single App)

For more details, visit: MageNative Pricing Page
- Click on the “GET STARTED” button of the specific plan that needs to be purchased. It will take you to the billing section of your Shopify admin panel.
- Choose your payment method from the billing section (i.e., debit/credit card or UPI) and proceed to make payment. Once your final payment gets processed, your new plan will get activated.


Important Note: If you change your plan within the same type (monthly to monthly or yearly to yearly), Shopify will adjust the billing accordingly. In case you switch your plan from a monthly to a yearly one, or vice versa. before your existing plan ends, you will be required to pay an invoice for both periods.
Congratulations! You have successfully changed your MageNative plan and activated your new plan!
Feel free to reach out to our support team if you have questions or need support. We are here to help and address any issues you may have!


