Push Notifications
At MageNative, we understand the importance of push notifications in retaining customers and boosting sales. Communicating with customers through push notifications not only enhances engagement but also increases customer loyalty and conversions.
You can send push notifications in three ways with MageNative:
- Automated Push Notifications
- Manual Push Notifications
- AI-generated Push Notifications using AI Notify Genie
Here’s a look of MageNative’s Push Notification Dashboard:

In this document, we’ll guide you step by step on how to implement each method to send push notifications to your customers.
How to Send Push Notifications Using MageNative Mobile App?
Automated Push Notifications
Automated push notifications allow merchants to connect with customers by automatically sending messages triggered by common user actions. These include scenarios such as welcoming new users or reminding customers about abandoned carts. Automating these notifications helps merchants save time and effort while maintaining consistent communication.
MageNative supports three types of automated push notifications:
- Welcome Notification
- Abandoned Cart
- Inactive User
1. Log in to your MageNative App dashboard using your credentials.
2. Select Push Notification from the left-hand menu bar and navigate to Automation. You’ll see all three notification types listed.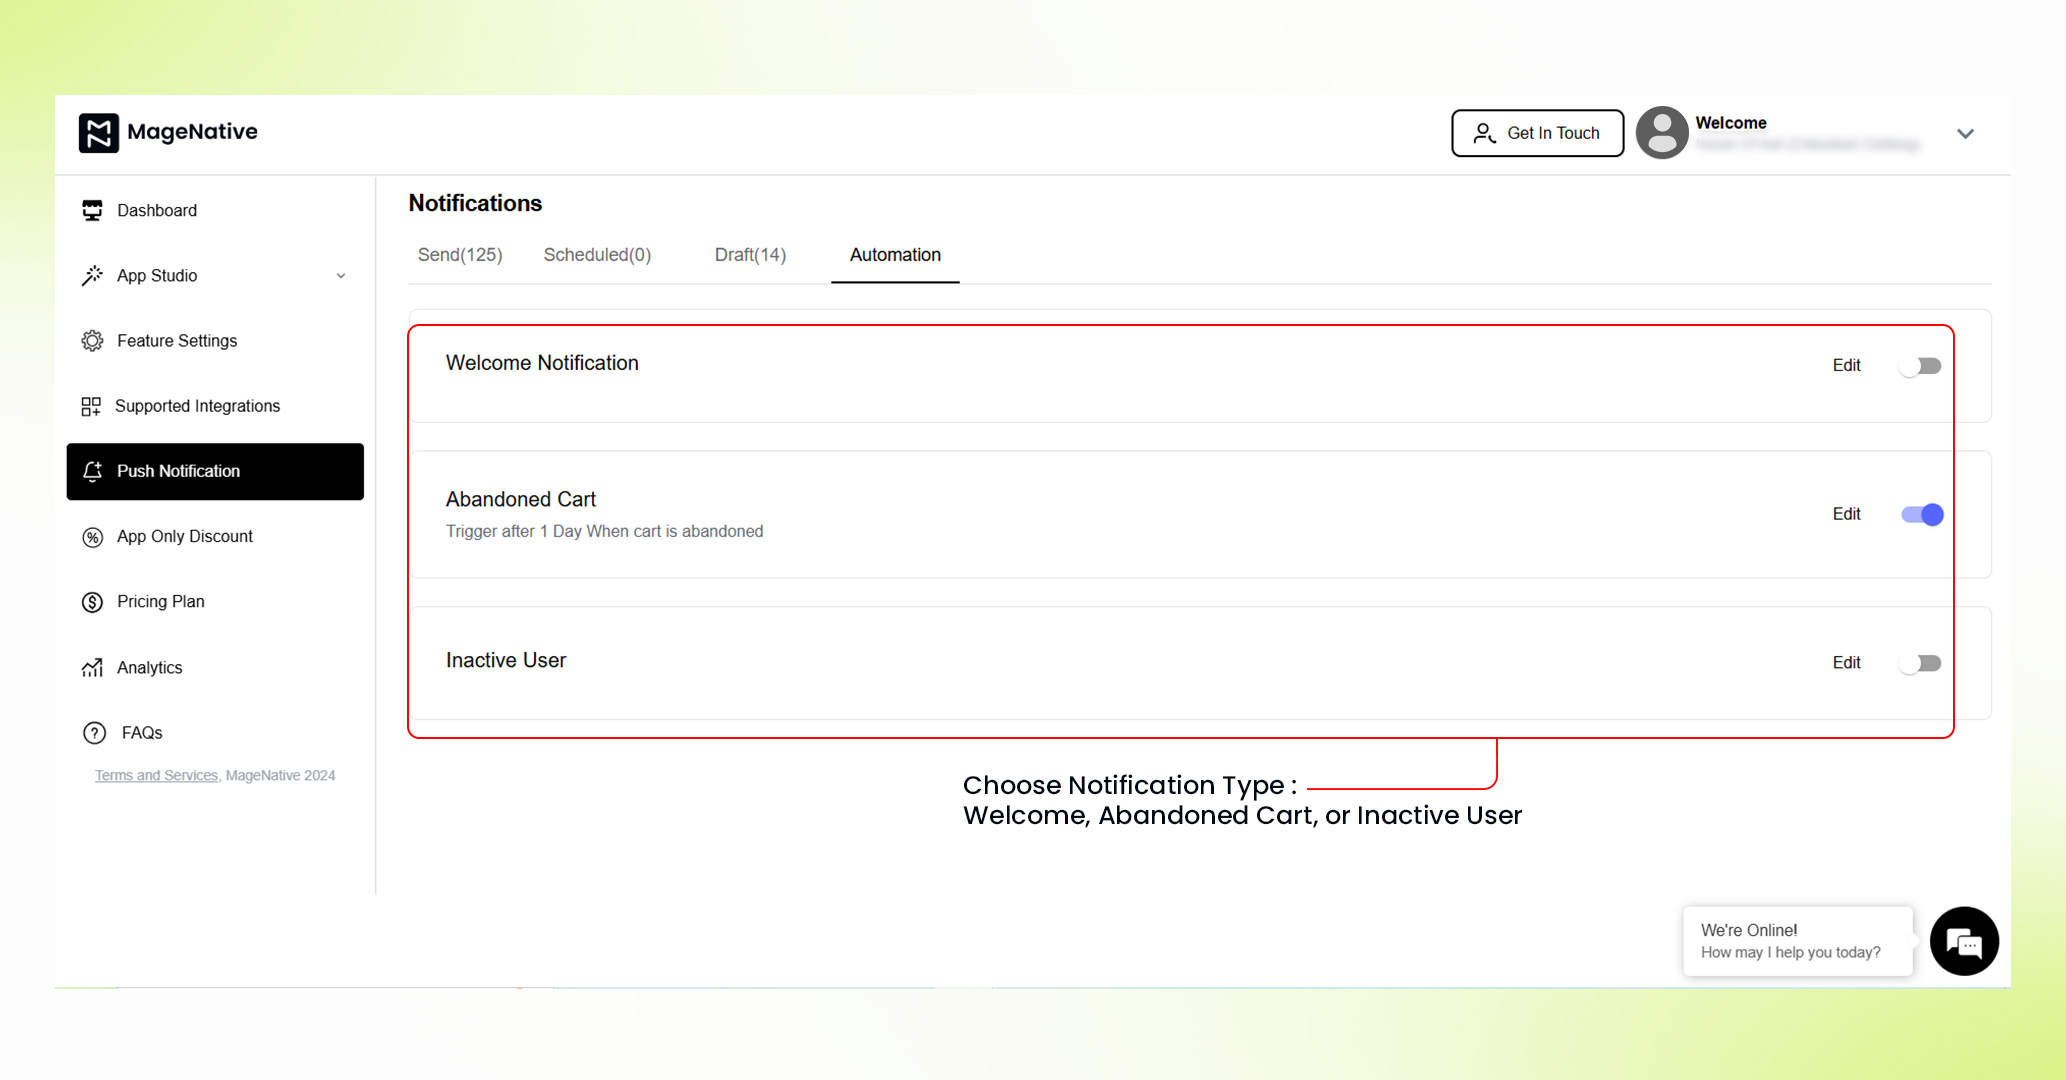
3. Choose the notification type you want to enable.
4. Click the corresponding Edit icon to open the Compose Notification window.
5. Fill in all required details, including the notification Title, Message, Image, Link, etc.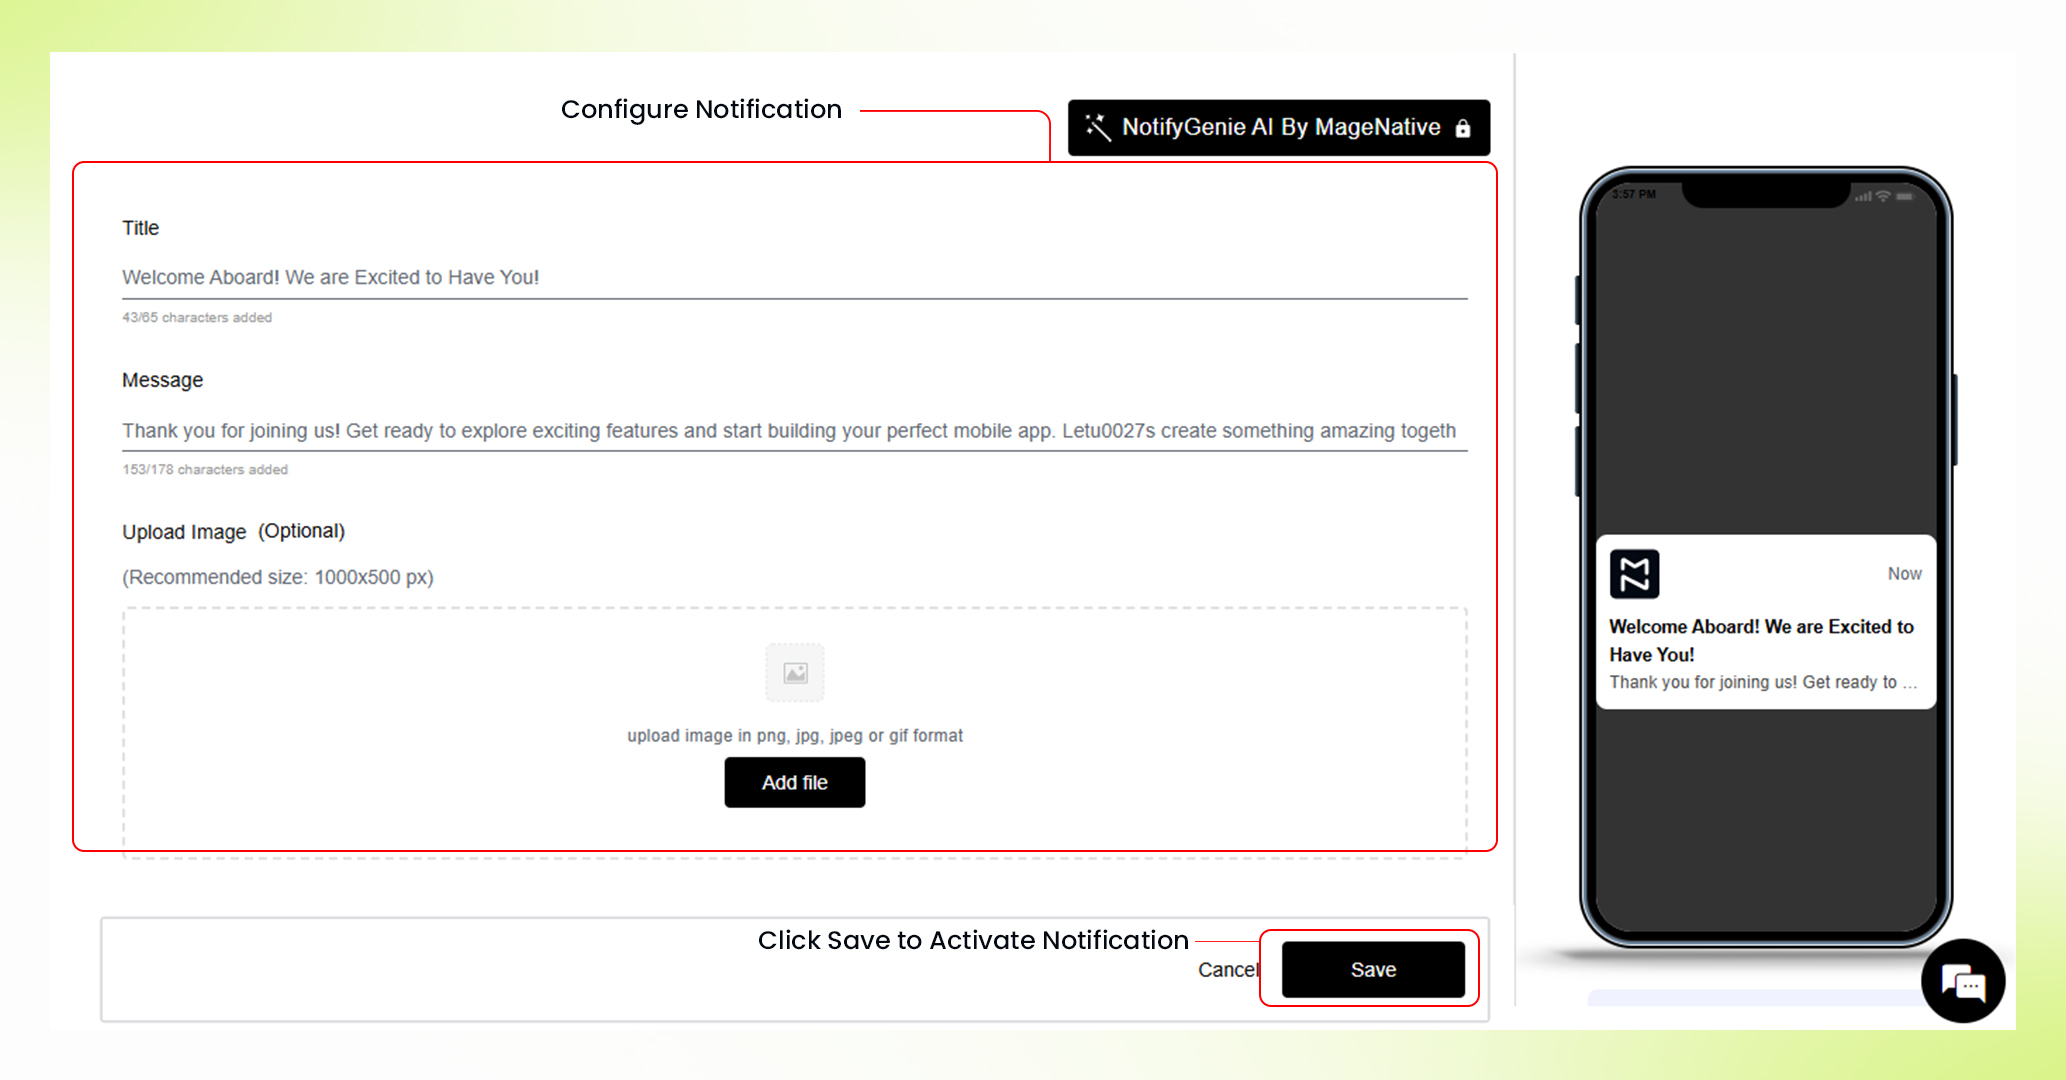
6. Click the Save button. You’ll see a confirmation popup stating “Notification Activated Successfully.”
Manually Sending Push Notifications
You can also compose and send push notifications manually if you want to do so. For this approach, follow these simple steps mentioned below:
1. Log in to your MageNative App dashboard using your credentials.
2. Select Push Notification from the left-hand menu bar.
3. Click the Add New Notification button in the top-right corner.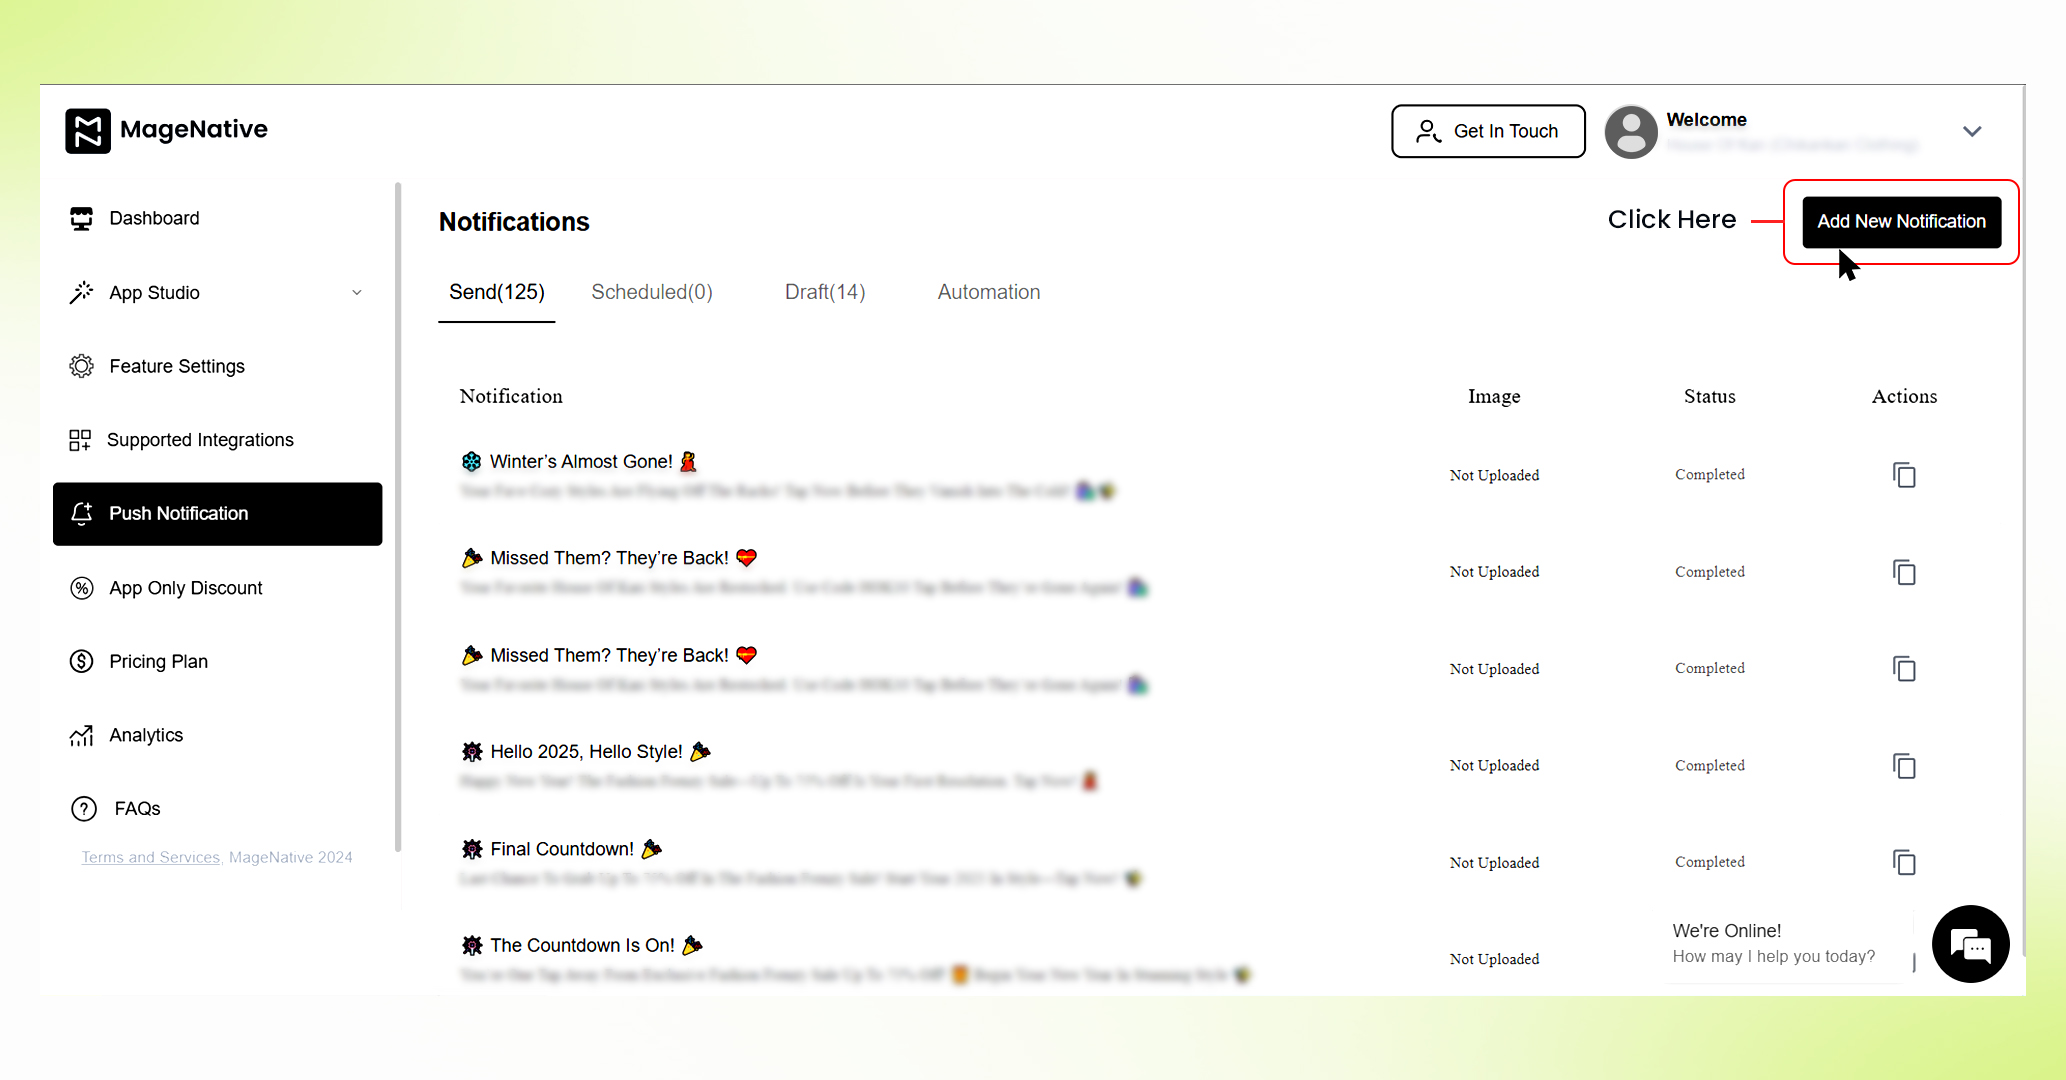
4. Enter all required details, including the notification title, message, and image (if you want to attach one).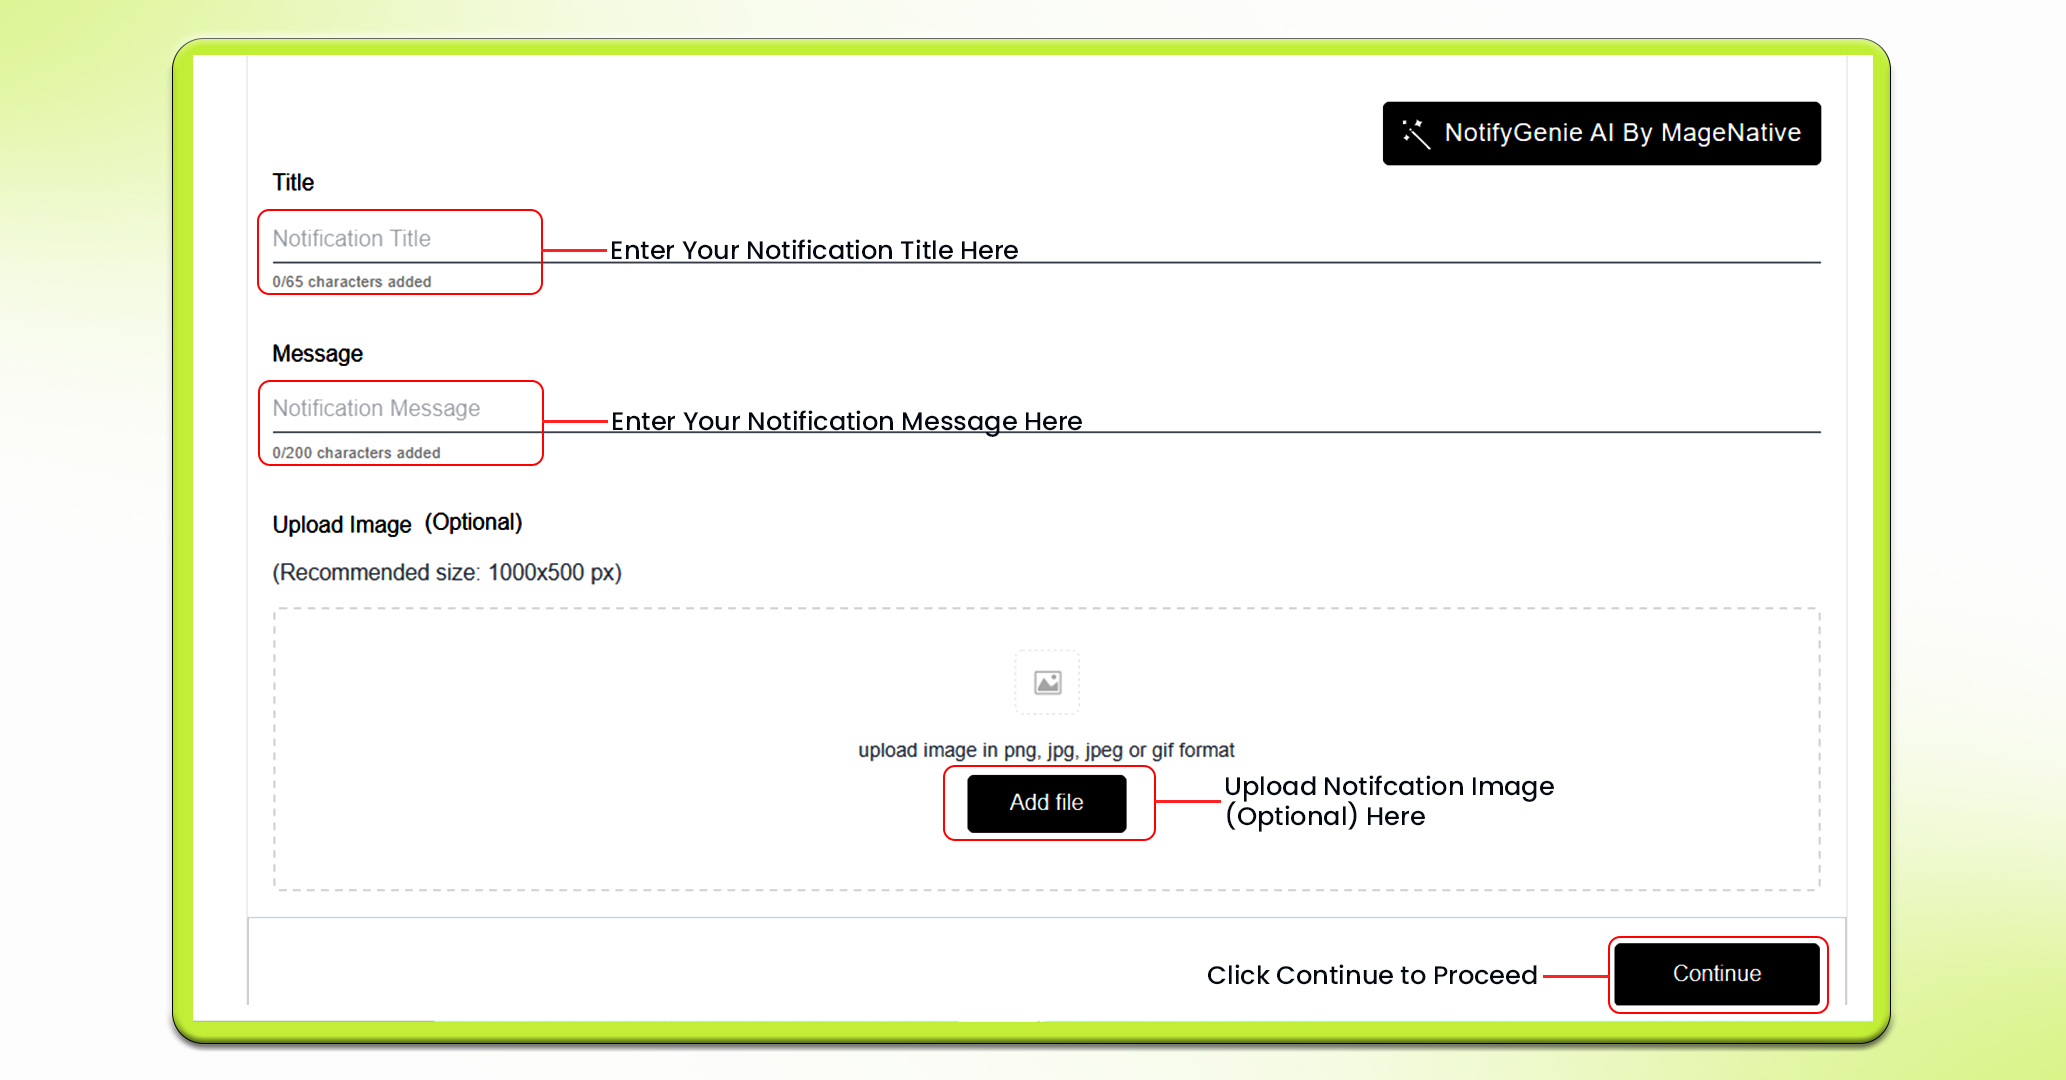
5. Then, Click on the Continue button. It will take you to the “Target” Section.
6. Choose which section of your app you want your customers to redirect to from your push notification. It can be – Collections, Custom Pages, Native Pages, Products etc.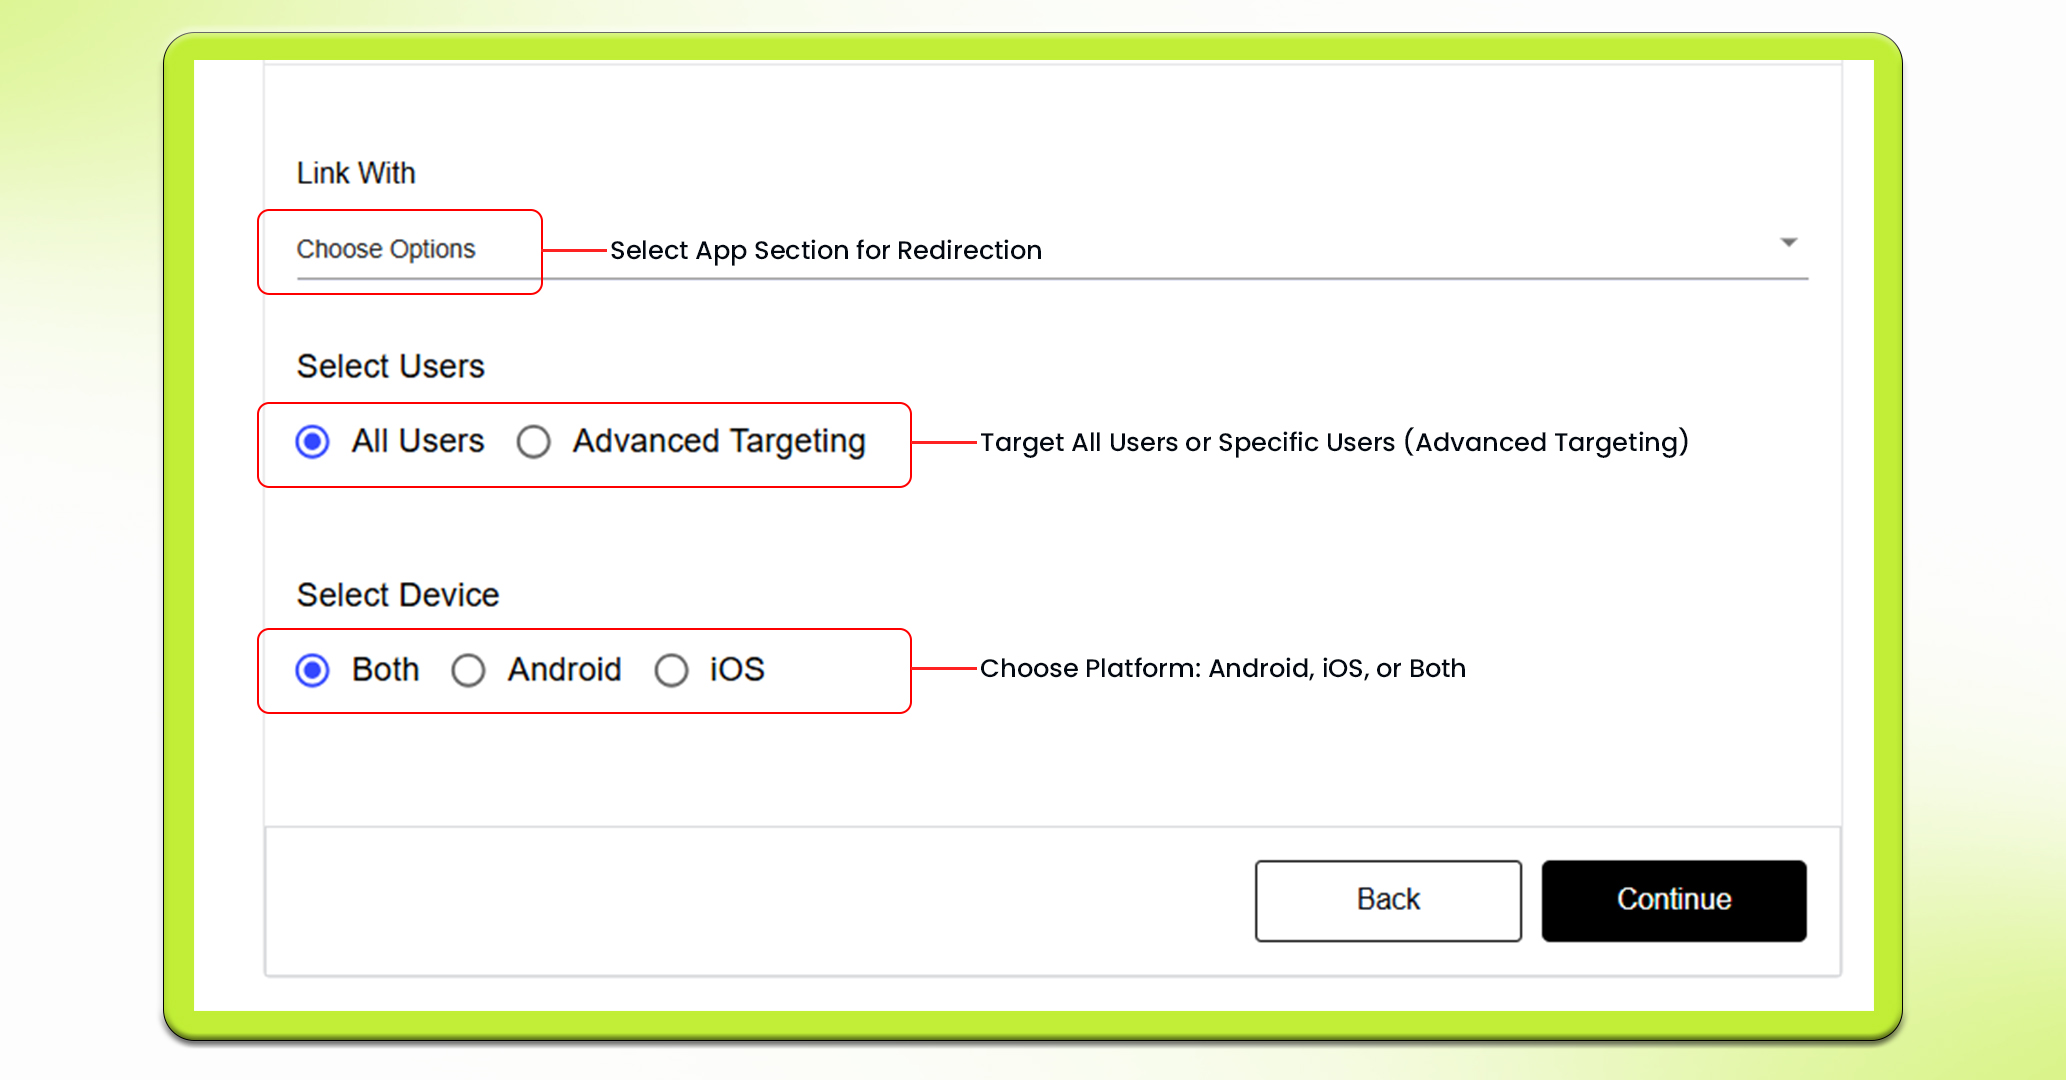
7. Next, Select whether you want to send your notification to “All Users” or specific users with – Advance Targeting.
8. Choose whether you want to target your notifications to android users, iOS users or Both.
9. If you select – Advance Targeting. Next, you will need to choose Target User Type from among the options available.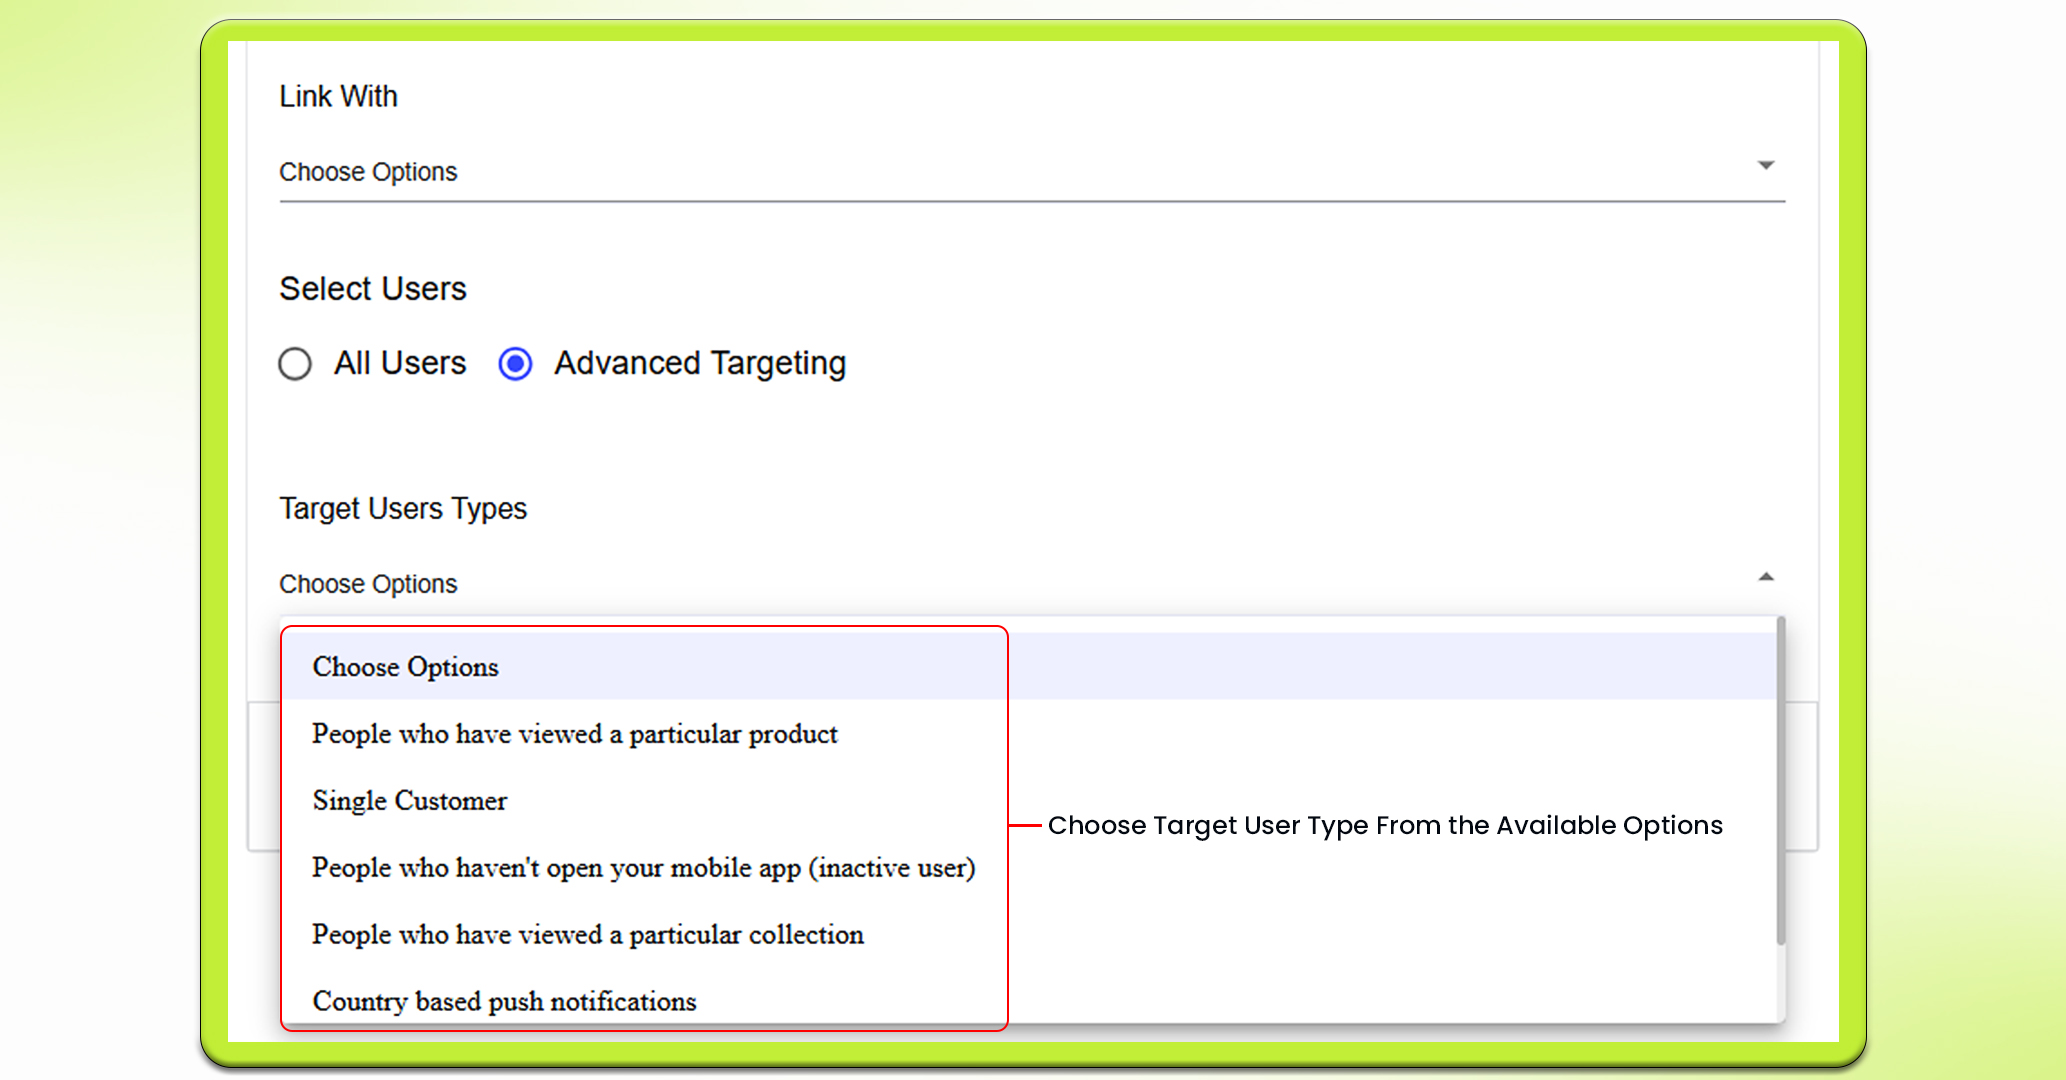
10. Next, Click on the Continue button to move to the “Delivery” section.
11. Select if you want to send your push notifications instantly, schedule it for later, or just save it as a draft for now.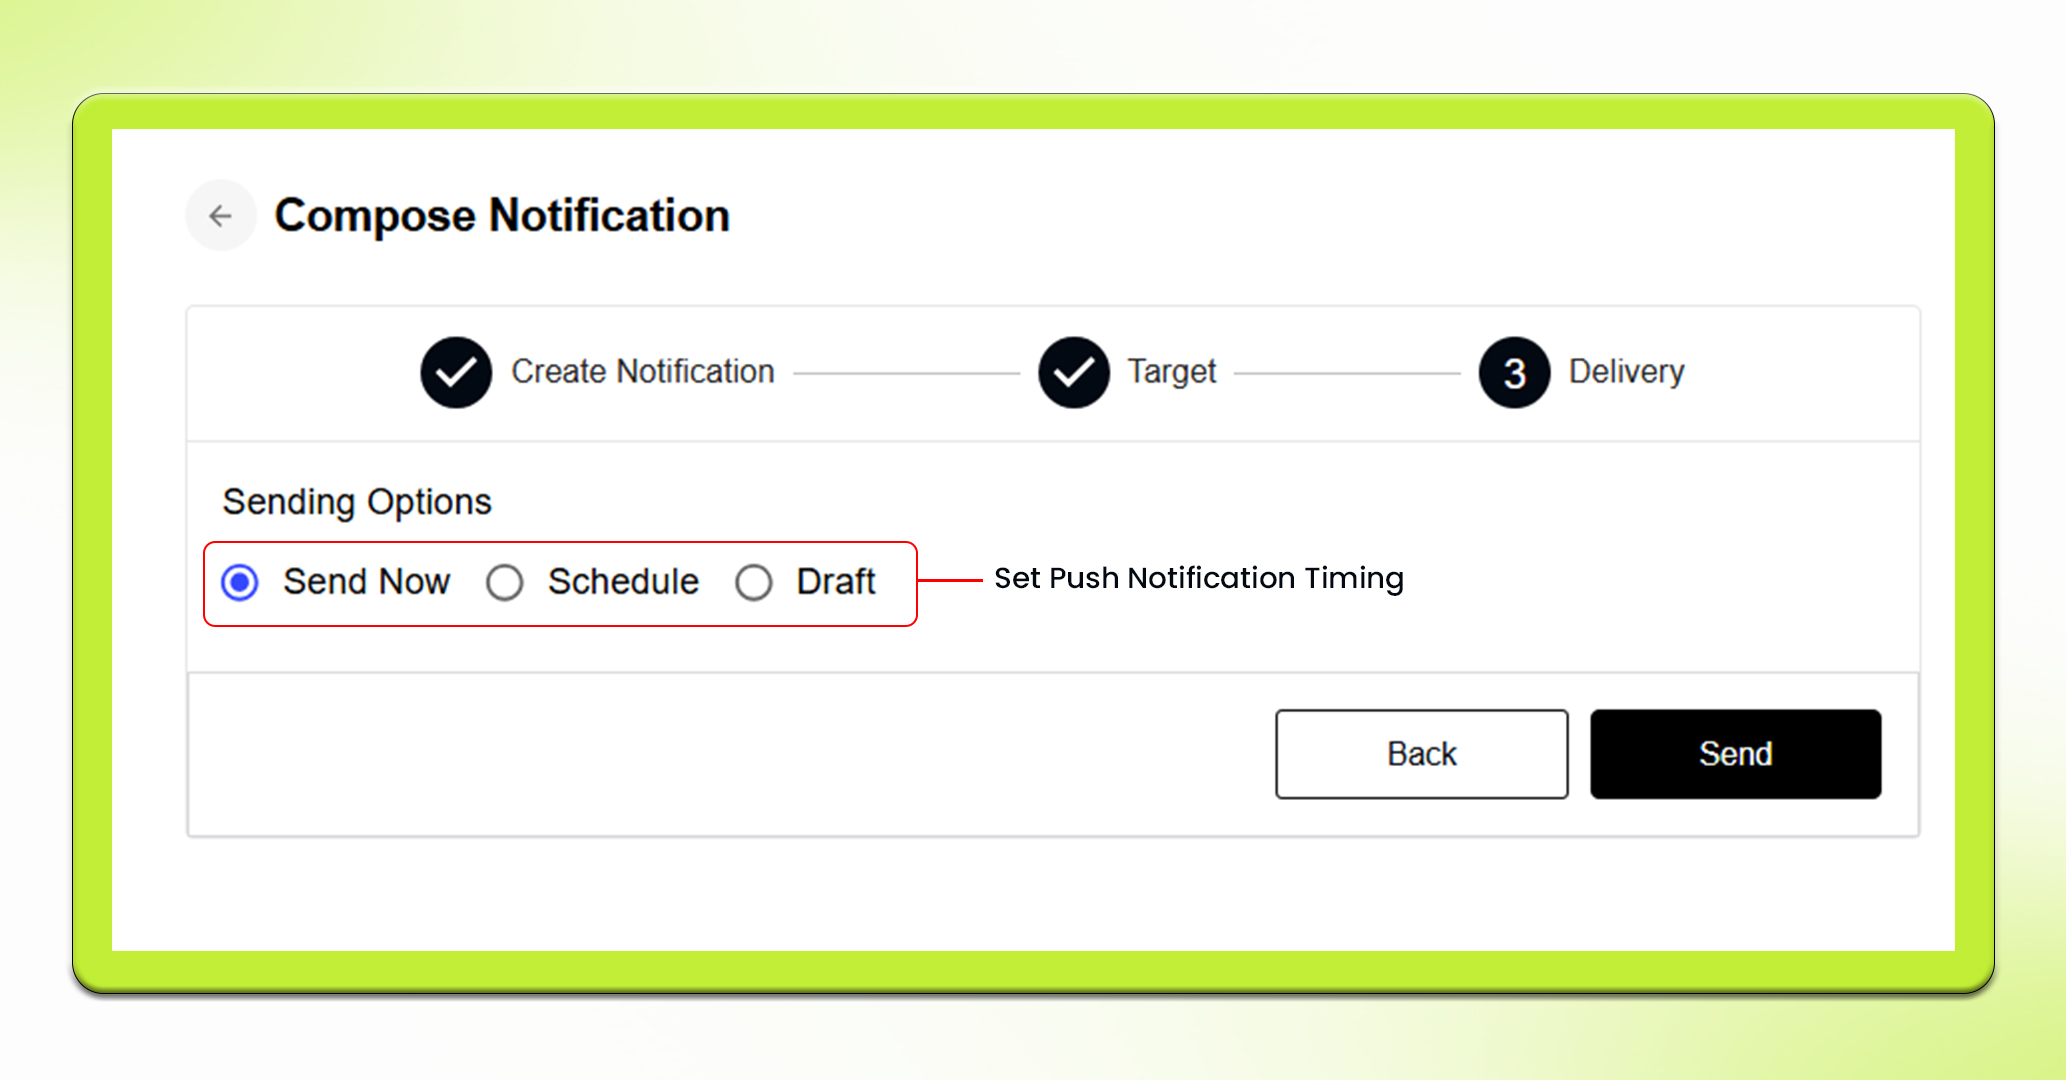
12. If you want to send instantly, just click the send button and your push notifications will be sent to your customers.
13. However, if you want to schedule your push notifications, you need to specify the date, time slot and time zone you want your push notifications to be sent at.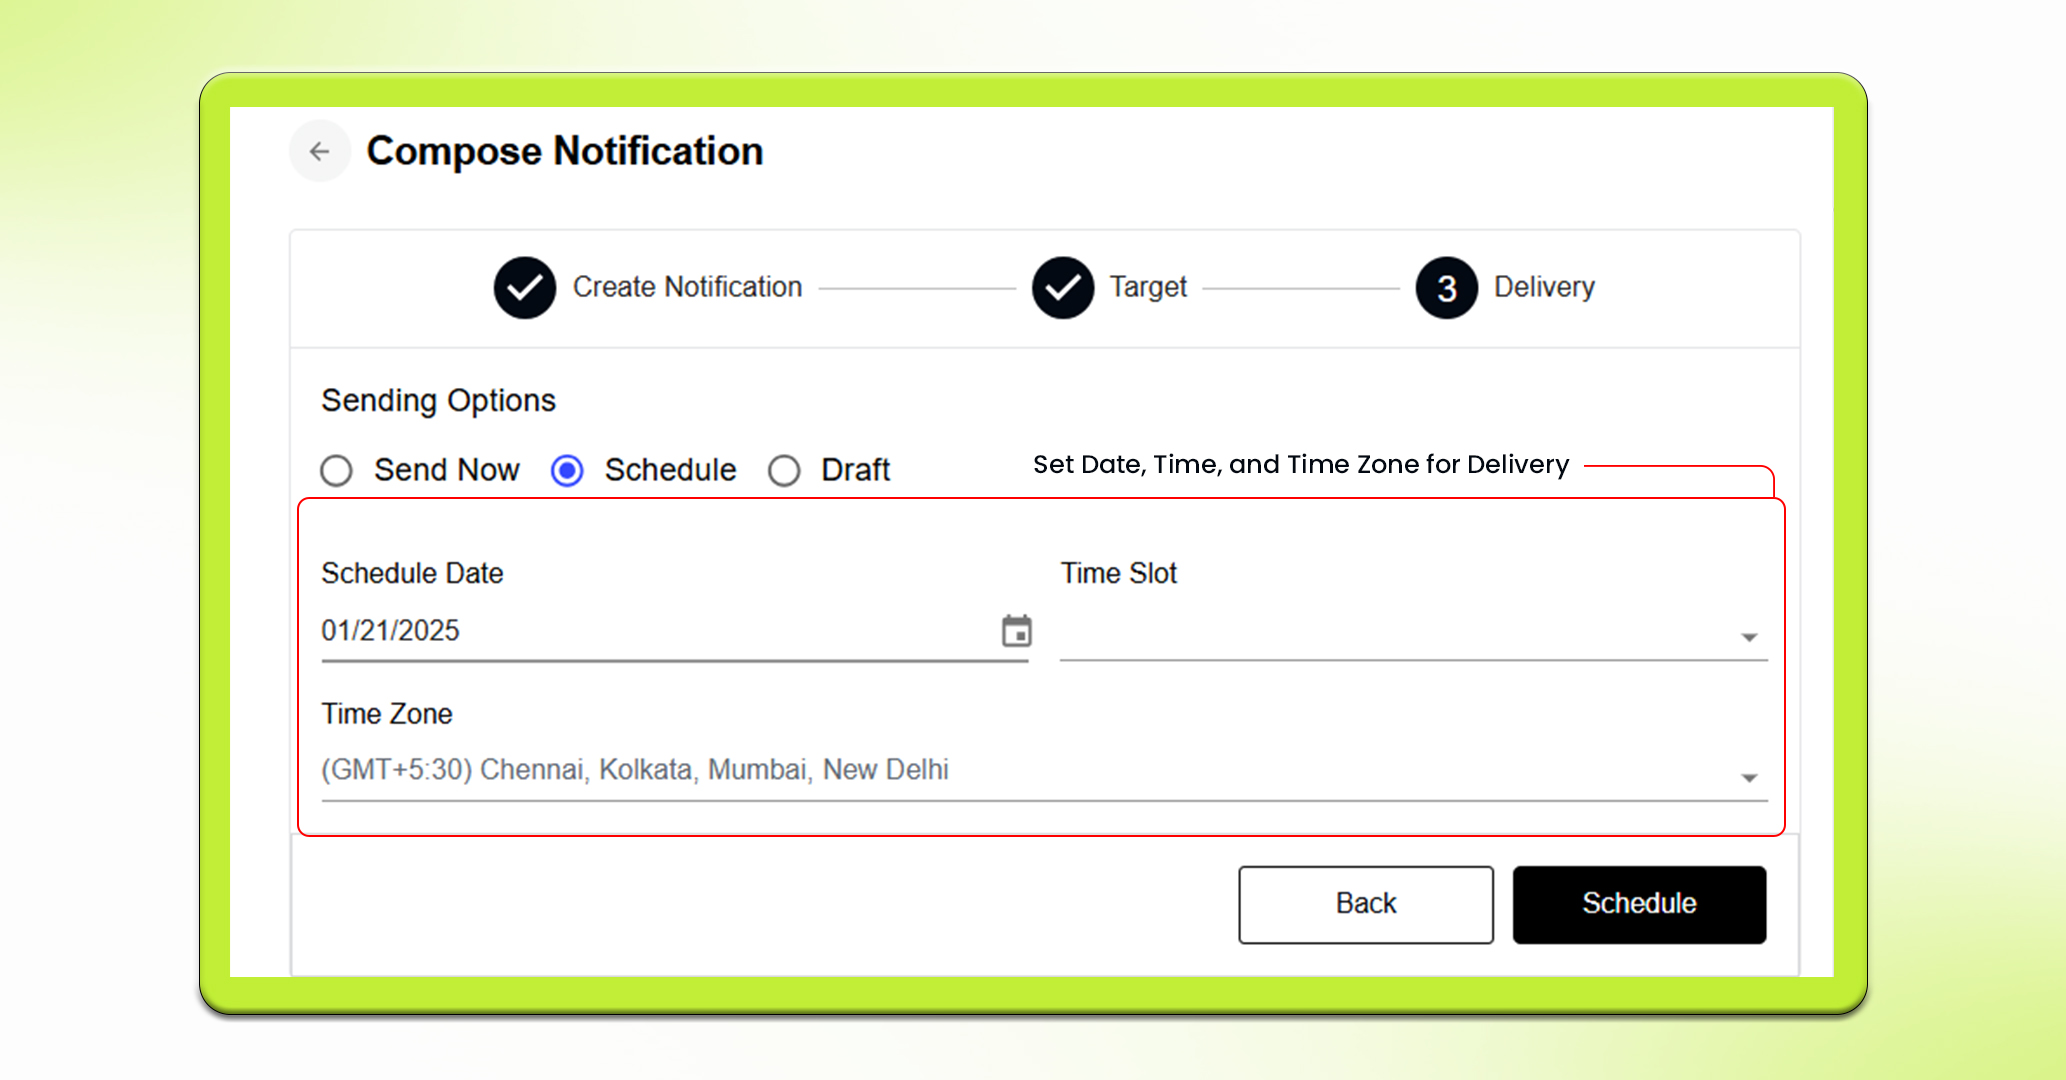
14. Moreover, If you want to draft it, simply click on the Save in Draft button.
Using NotifyGenie AI for Personalized Notifications
MageNative’s NotifyGenie AI can take your push notifications to a whole new level with personalized messages that resonate well with your customers. It helps you create customized messages that cater your audience’s individual preferences. It also effortlessly generates relevant images that complement your notifications.
Here’s a step by step guide that guide you how to avail this feature:
1. Login to your MageNative App dashboard using your credentials.
2. Select Push Notification from the left-hand menu bar.
3. Click on the Add New Notification button in the top-right corner. A new Compose Notification window will appear.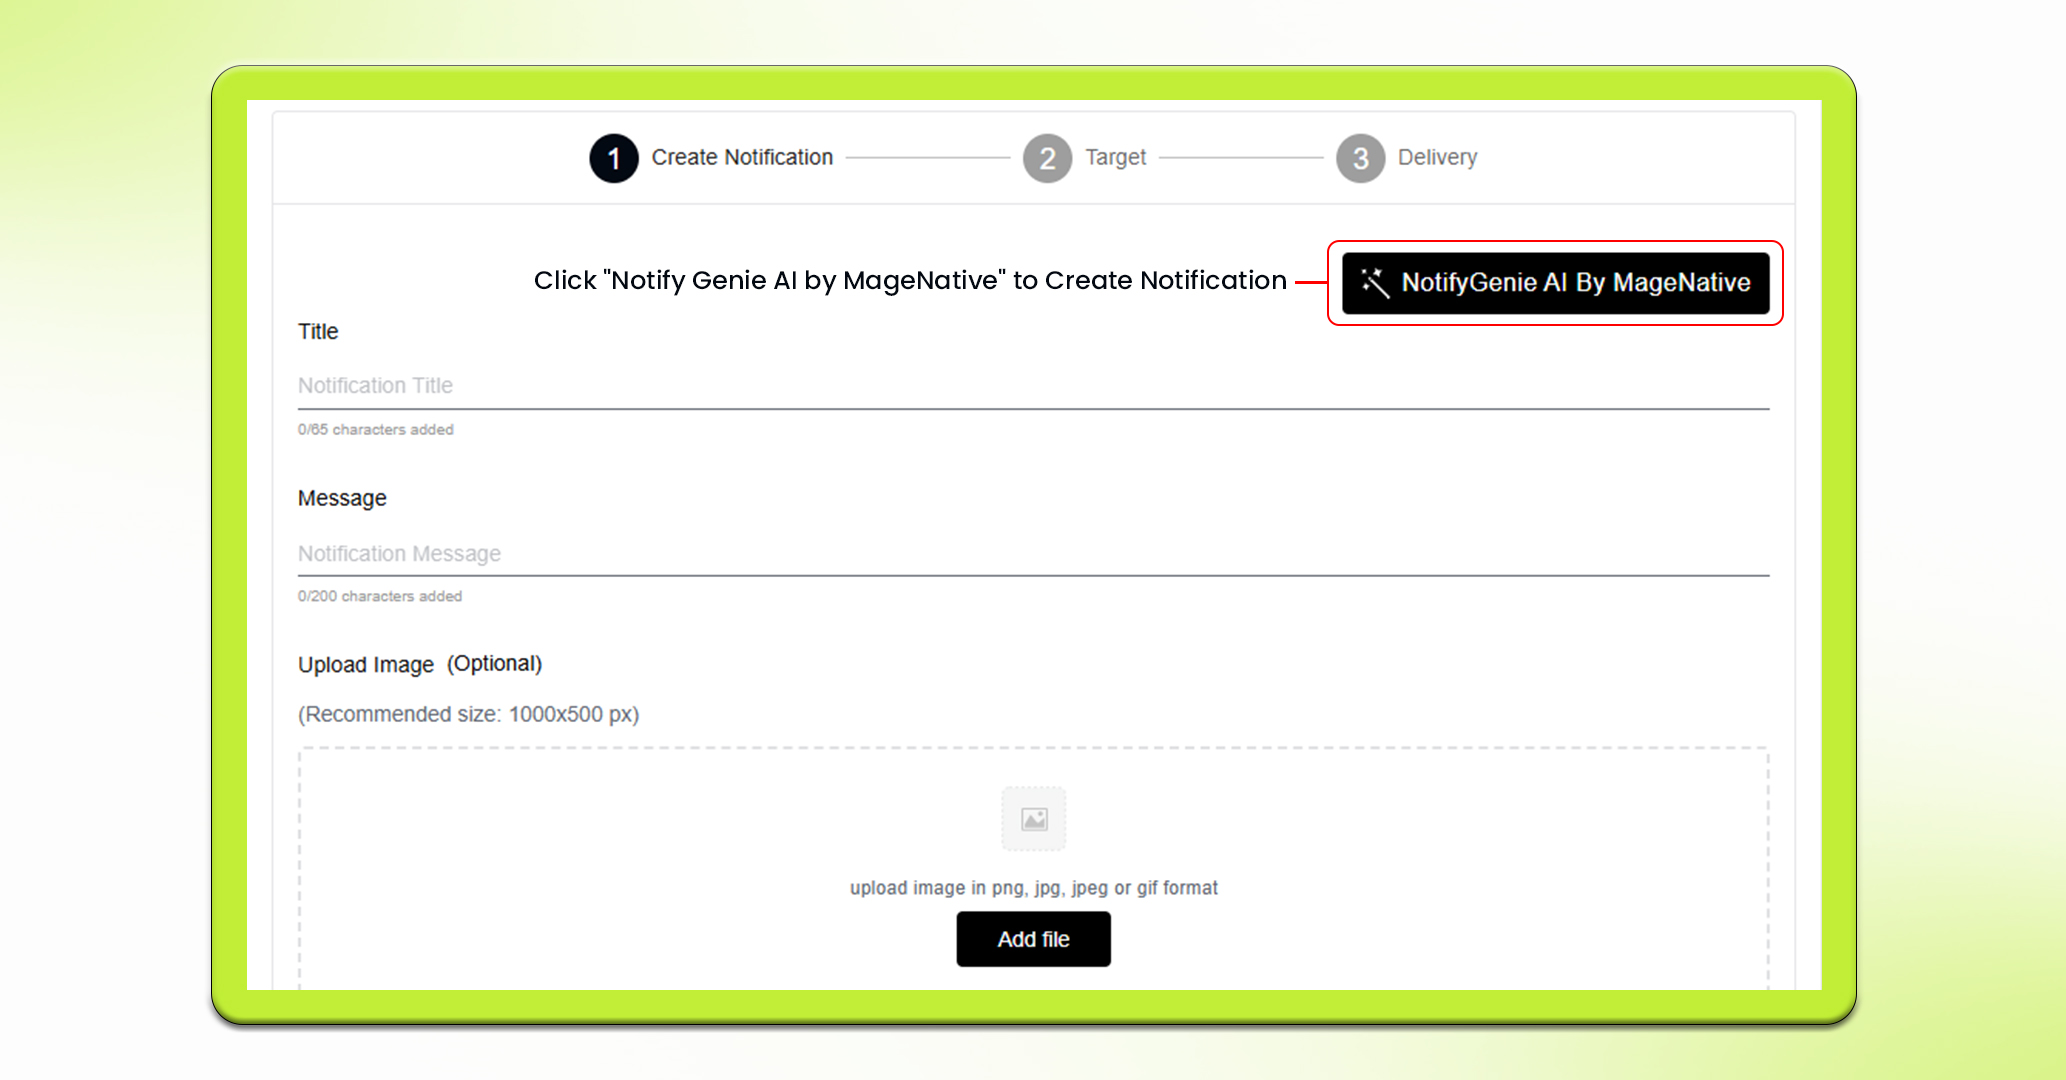
4. Now click on – “Notify Genie AI by MageNative” button. It will open up a pop up for push notification generation.
5. Select from the available prompts and copy it using the copy icon or write your own prompt in the text box to generate your personalized push notification.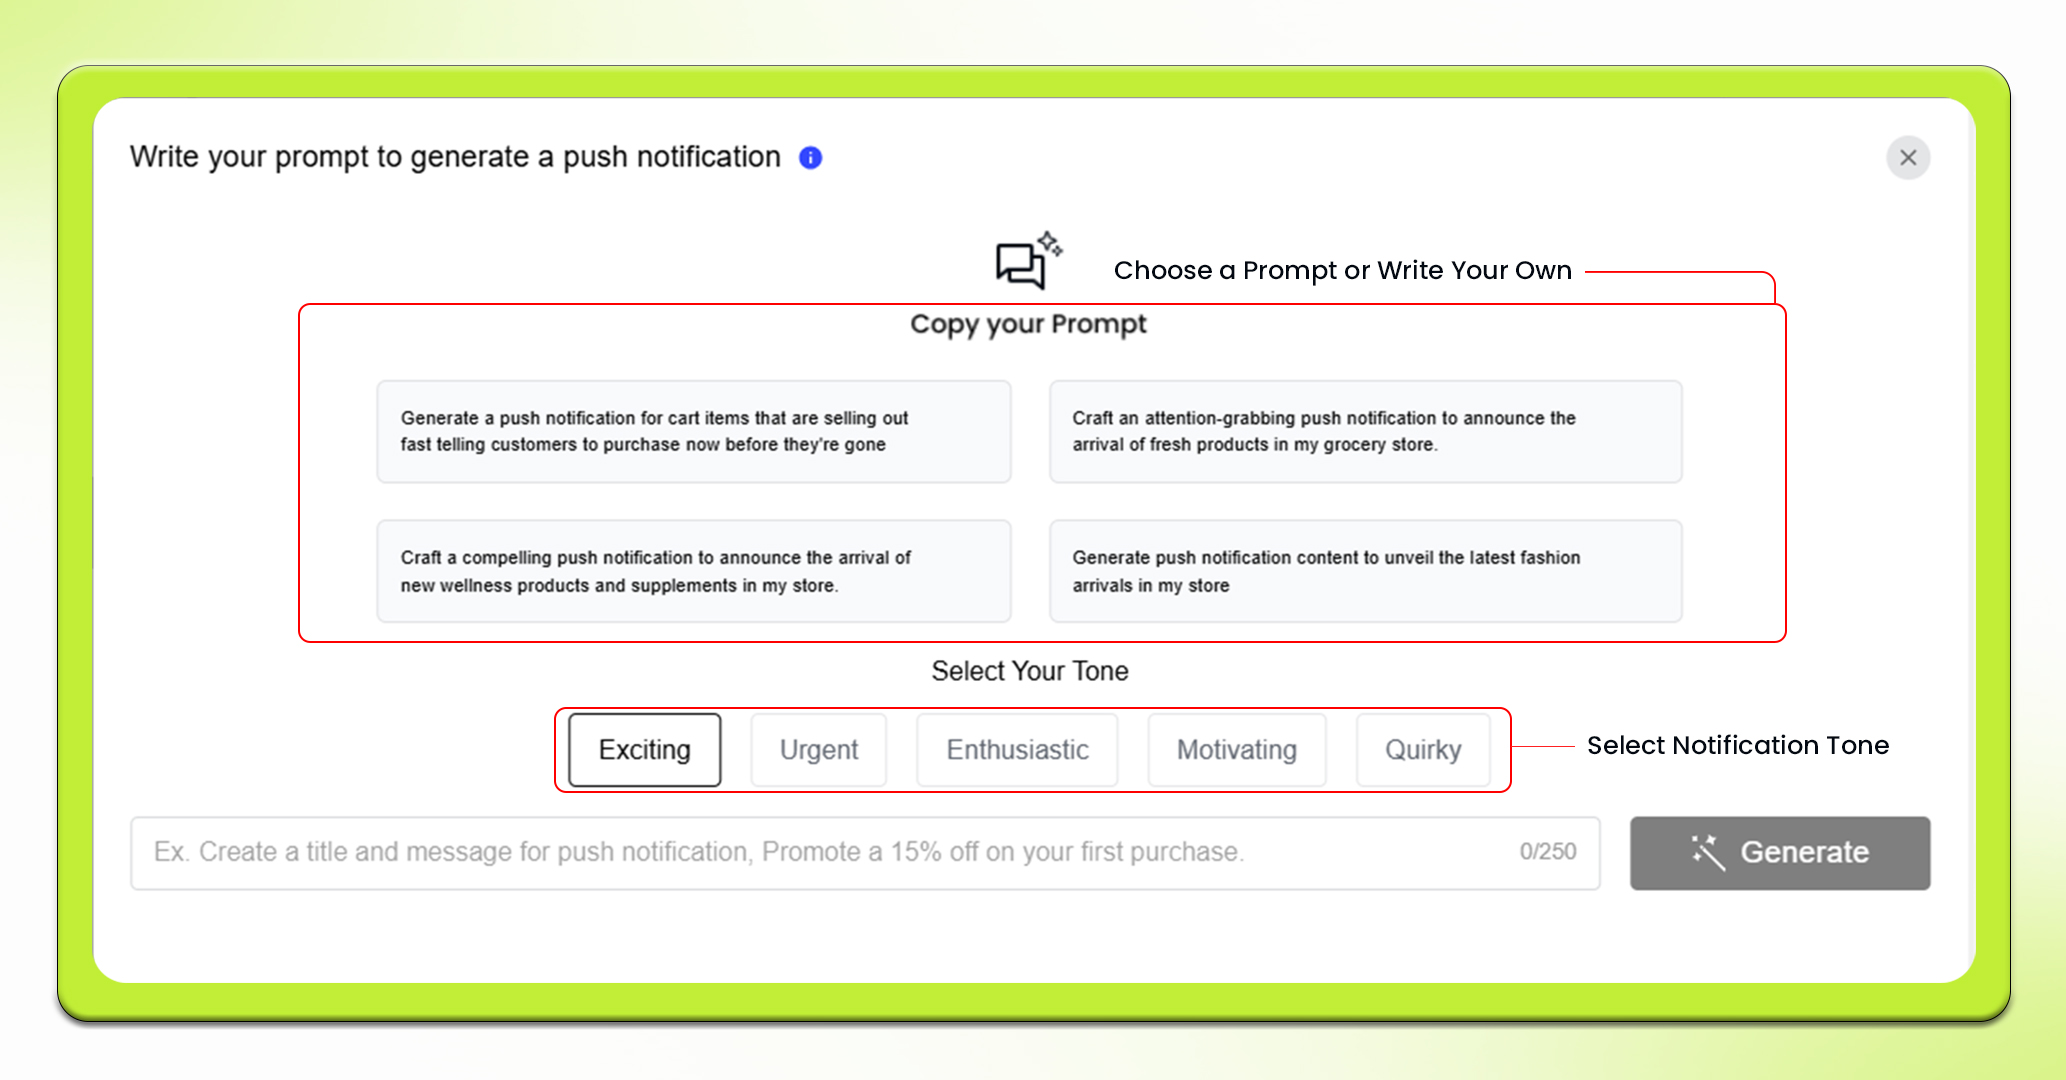
6. Next, select the tone you want for your push notification from among the following options – Exciting, Urgent, Enthusiastic, Motivating, and Quirky.
7. Finally, click on the Generate button. The AI will create text and an image for your push notification.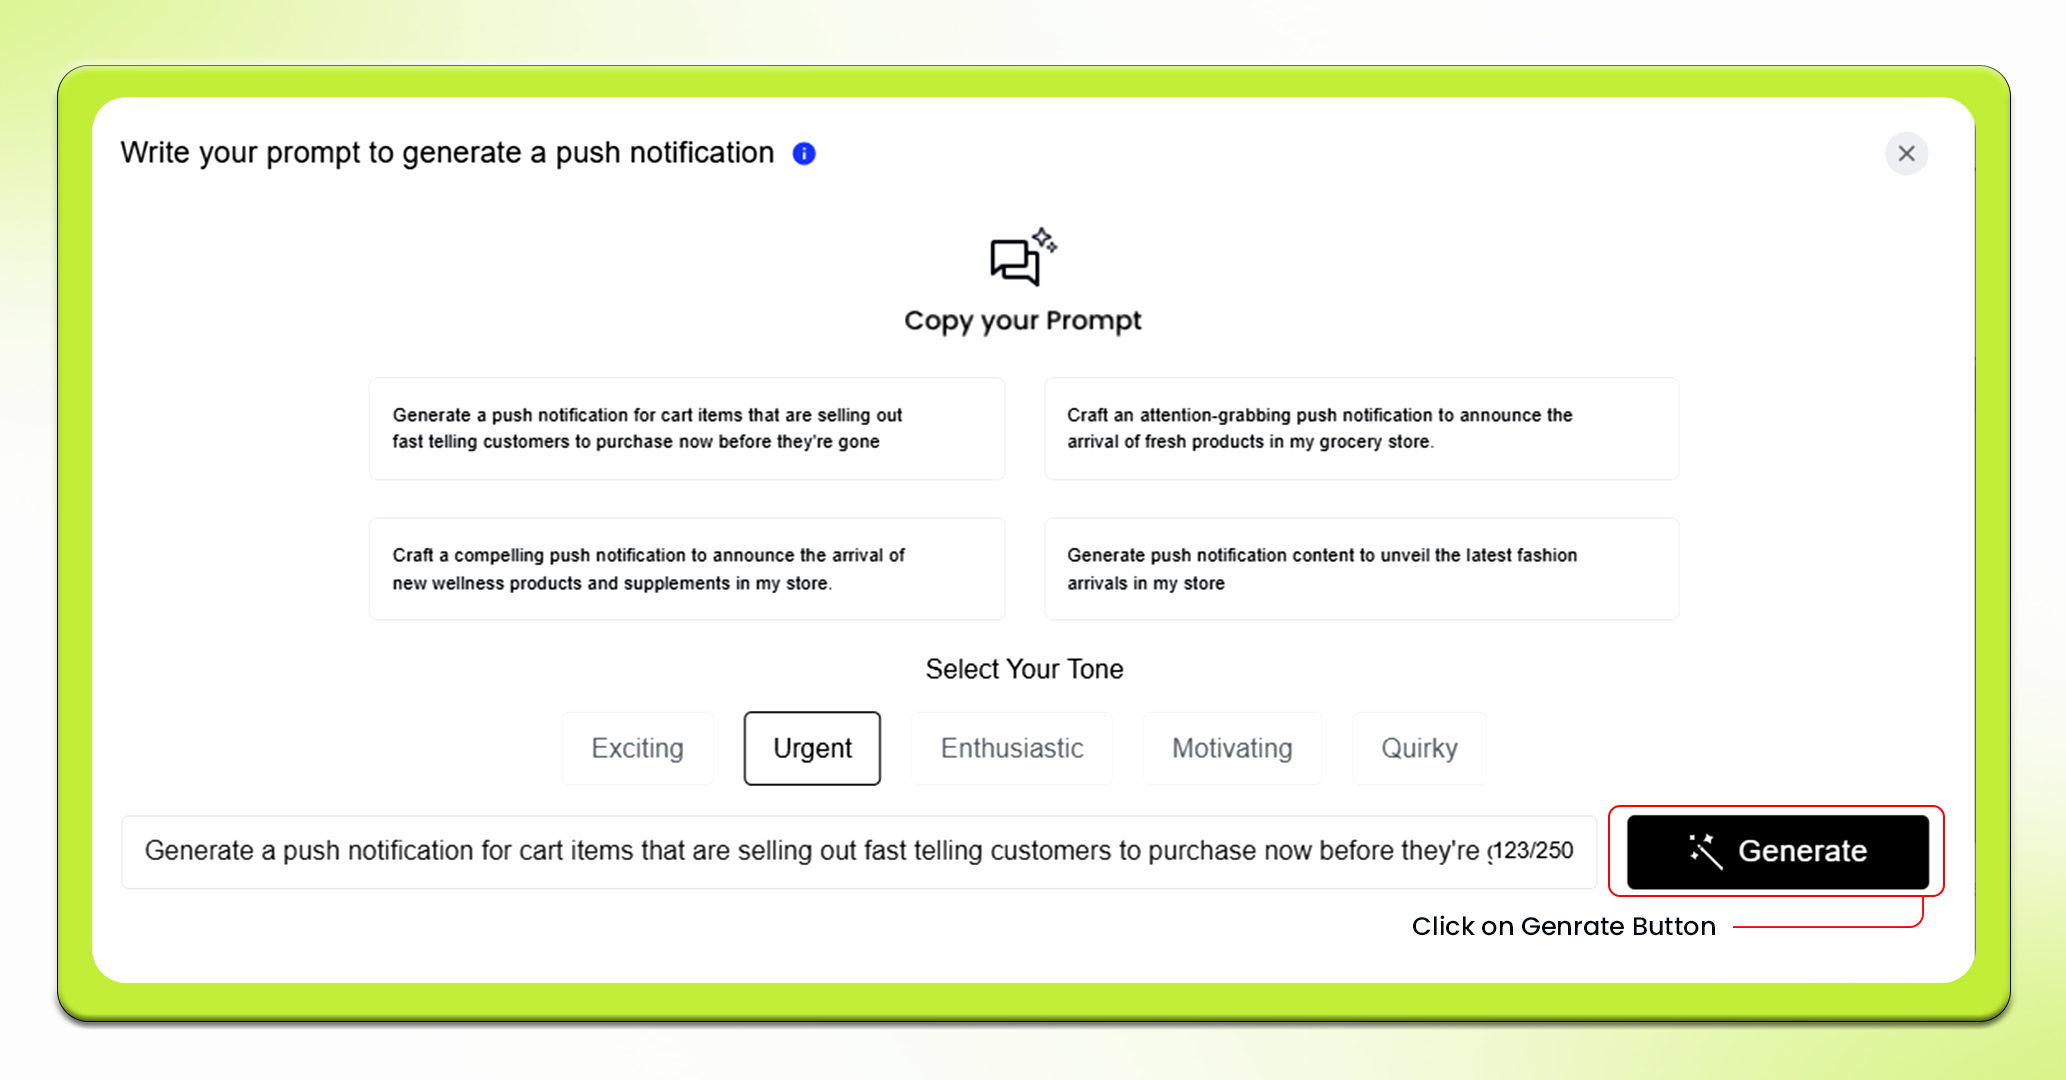
8. Your notification will get generated. Next, click on the Submit button. You will be redirected to the Compose Notification section.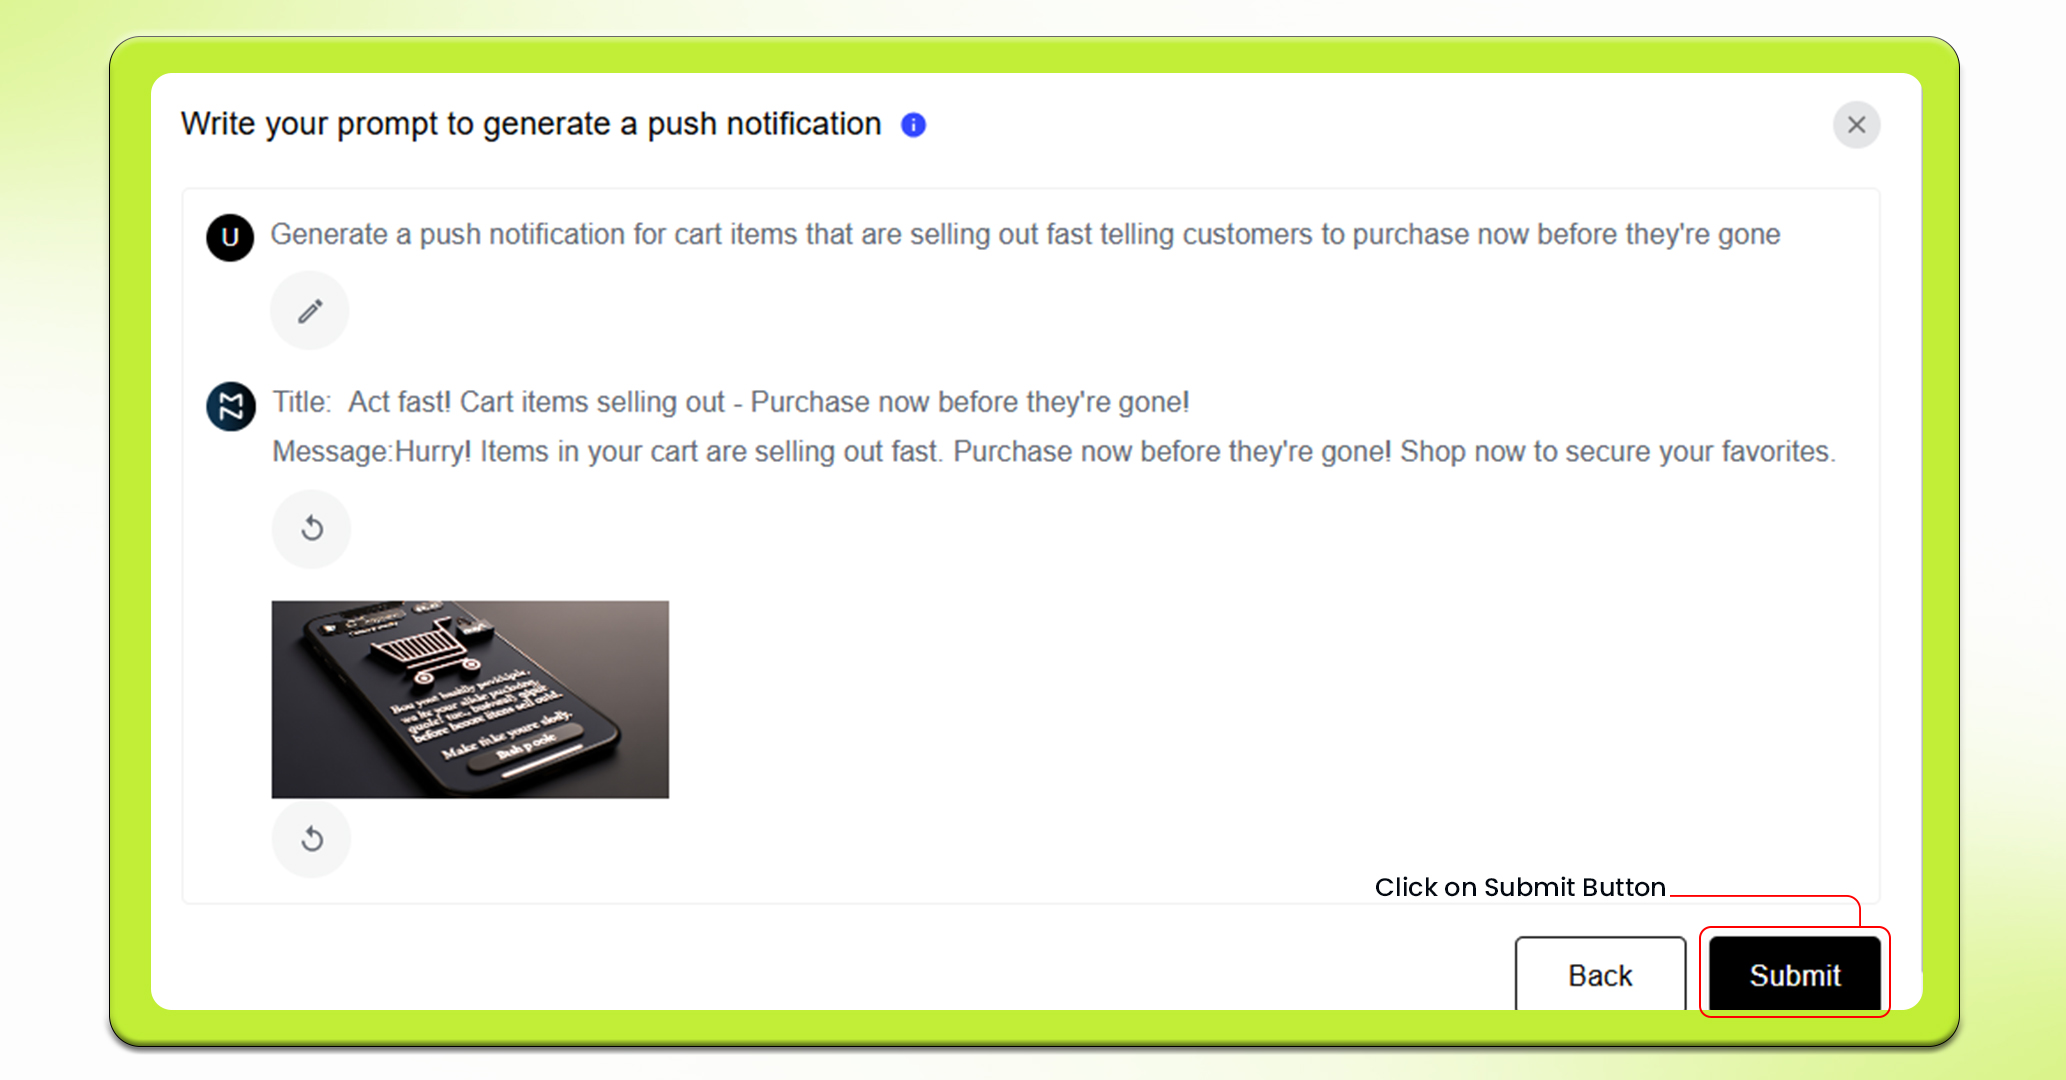
9. Here, you can select if you want to send your push notifications instantly, schedule it for later, or just save it as a draft for now.
10. If you want to send instantly, just click the send button and your push notifications will be sent to your customers.
11. However, if you want to schedule push notifications, you need to specify the date, time slot and time zone you want your push notifications to be sent at.
12. Moreover, If you want to draft it, simply click on the Save in Draft button.
Feel free to reach out to our support team if you have questions or need support. We are here to help and address any issues you may have!


