How to Add an Announcement Bar Component in Your Mobile App?
Want to make sure your latest offers, new arrivals, or special events never go unnoticed? The Announcement Bar Component by MageNative is designed just for that! It helps to grab user’s attention and drive user engagement.
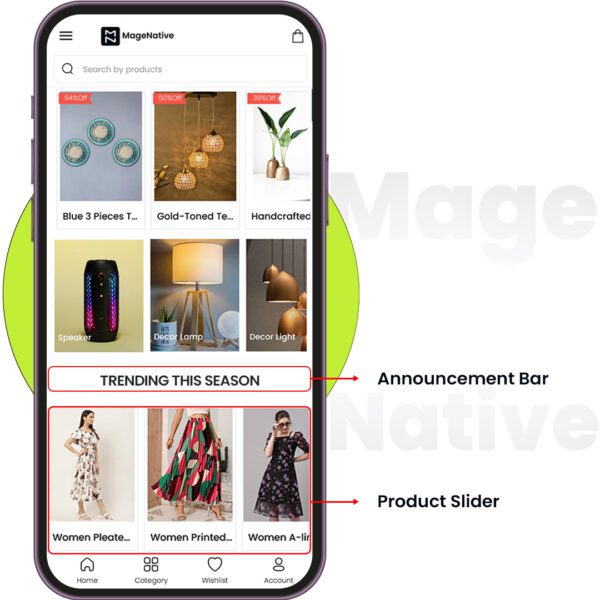
It allows you to spotlight special offers and updates so your most important messages get viewed first by your users, making your key announcements as effective as possible.
How to Set Up Your Announcement Bar on Your Mobile App?
1. Drag and drop the Announcement Bar component to your desired location on the app’s screen.
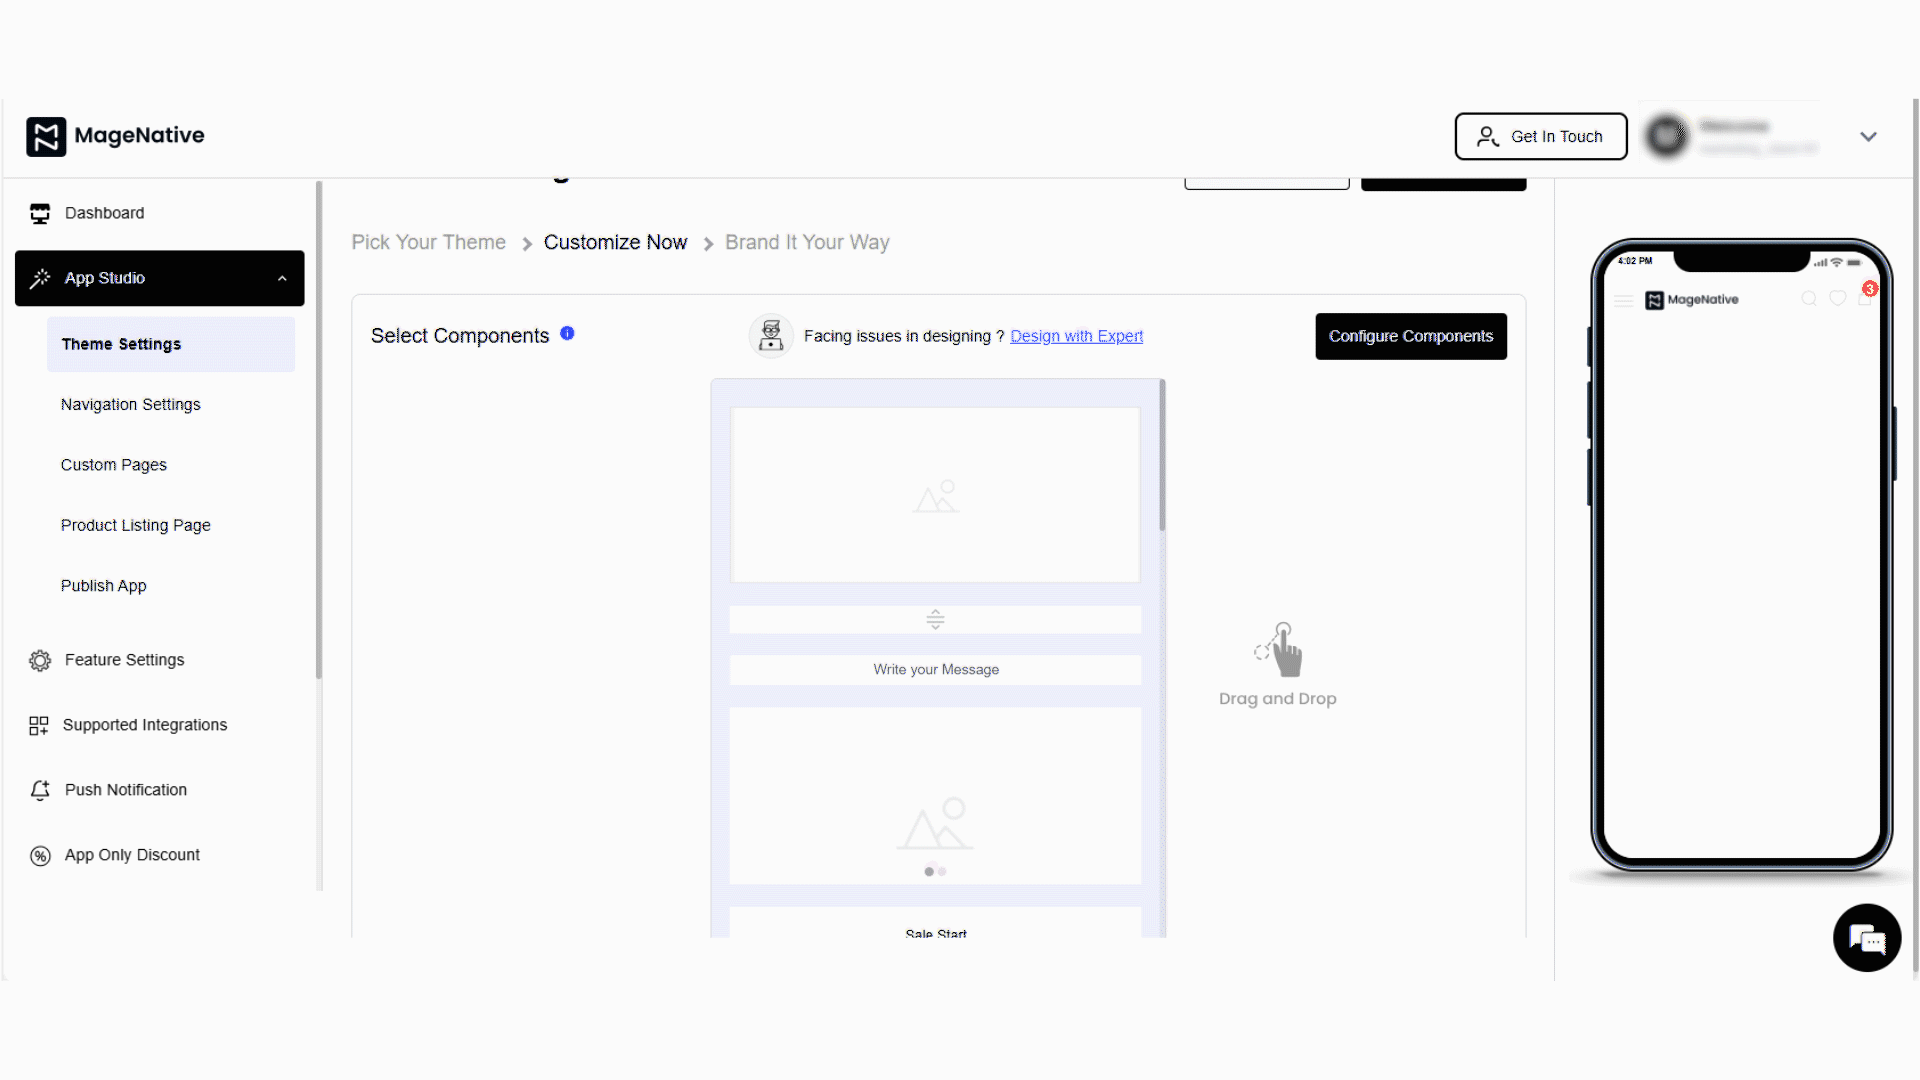
2. Click the Edit component to open the configuration menu at the center of your dashboard.
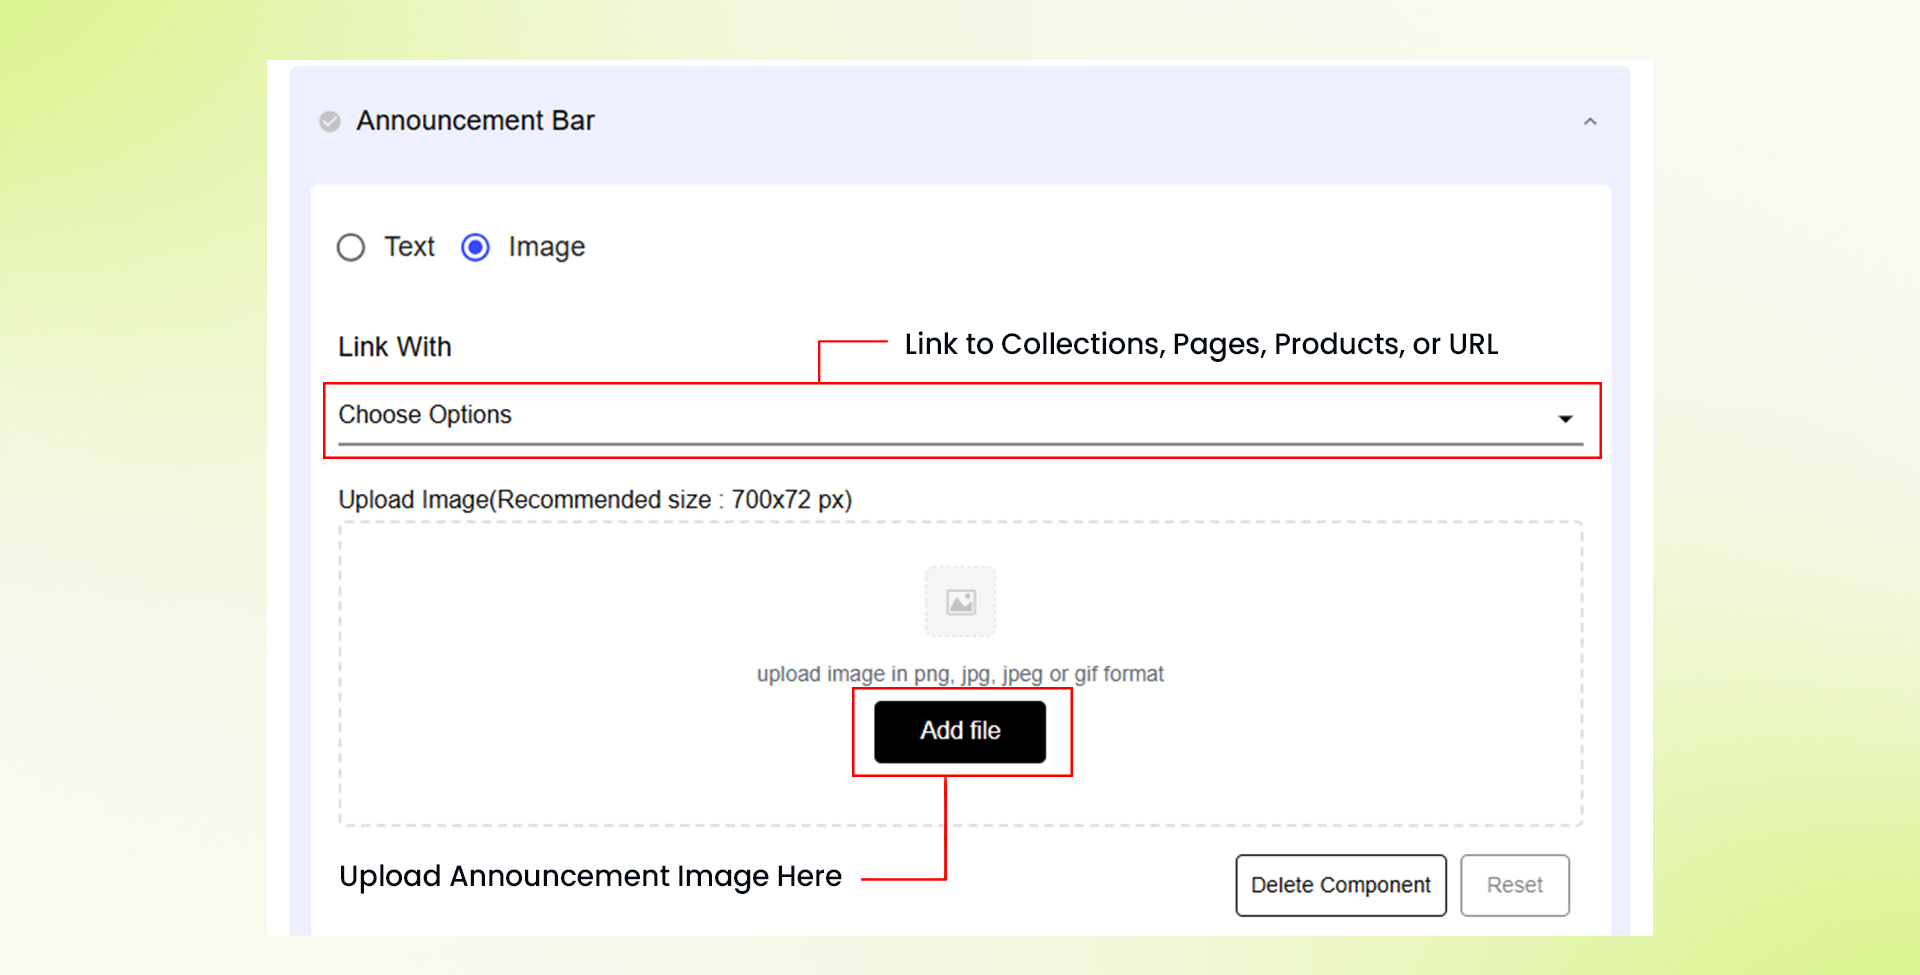
3. Select your announcement type – i.e whether you want to make the announcement in the form of text or image.
4. If you want text announcement – Configure the following:
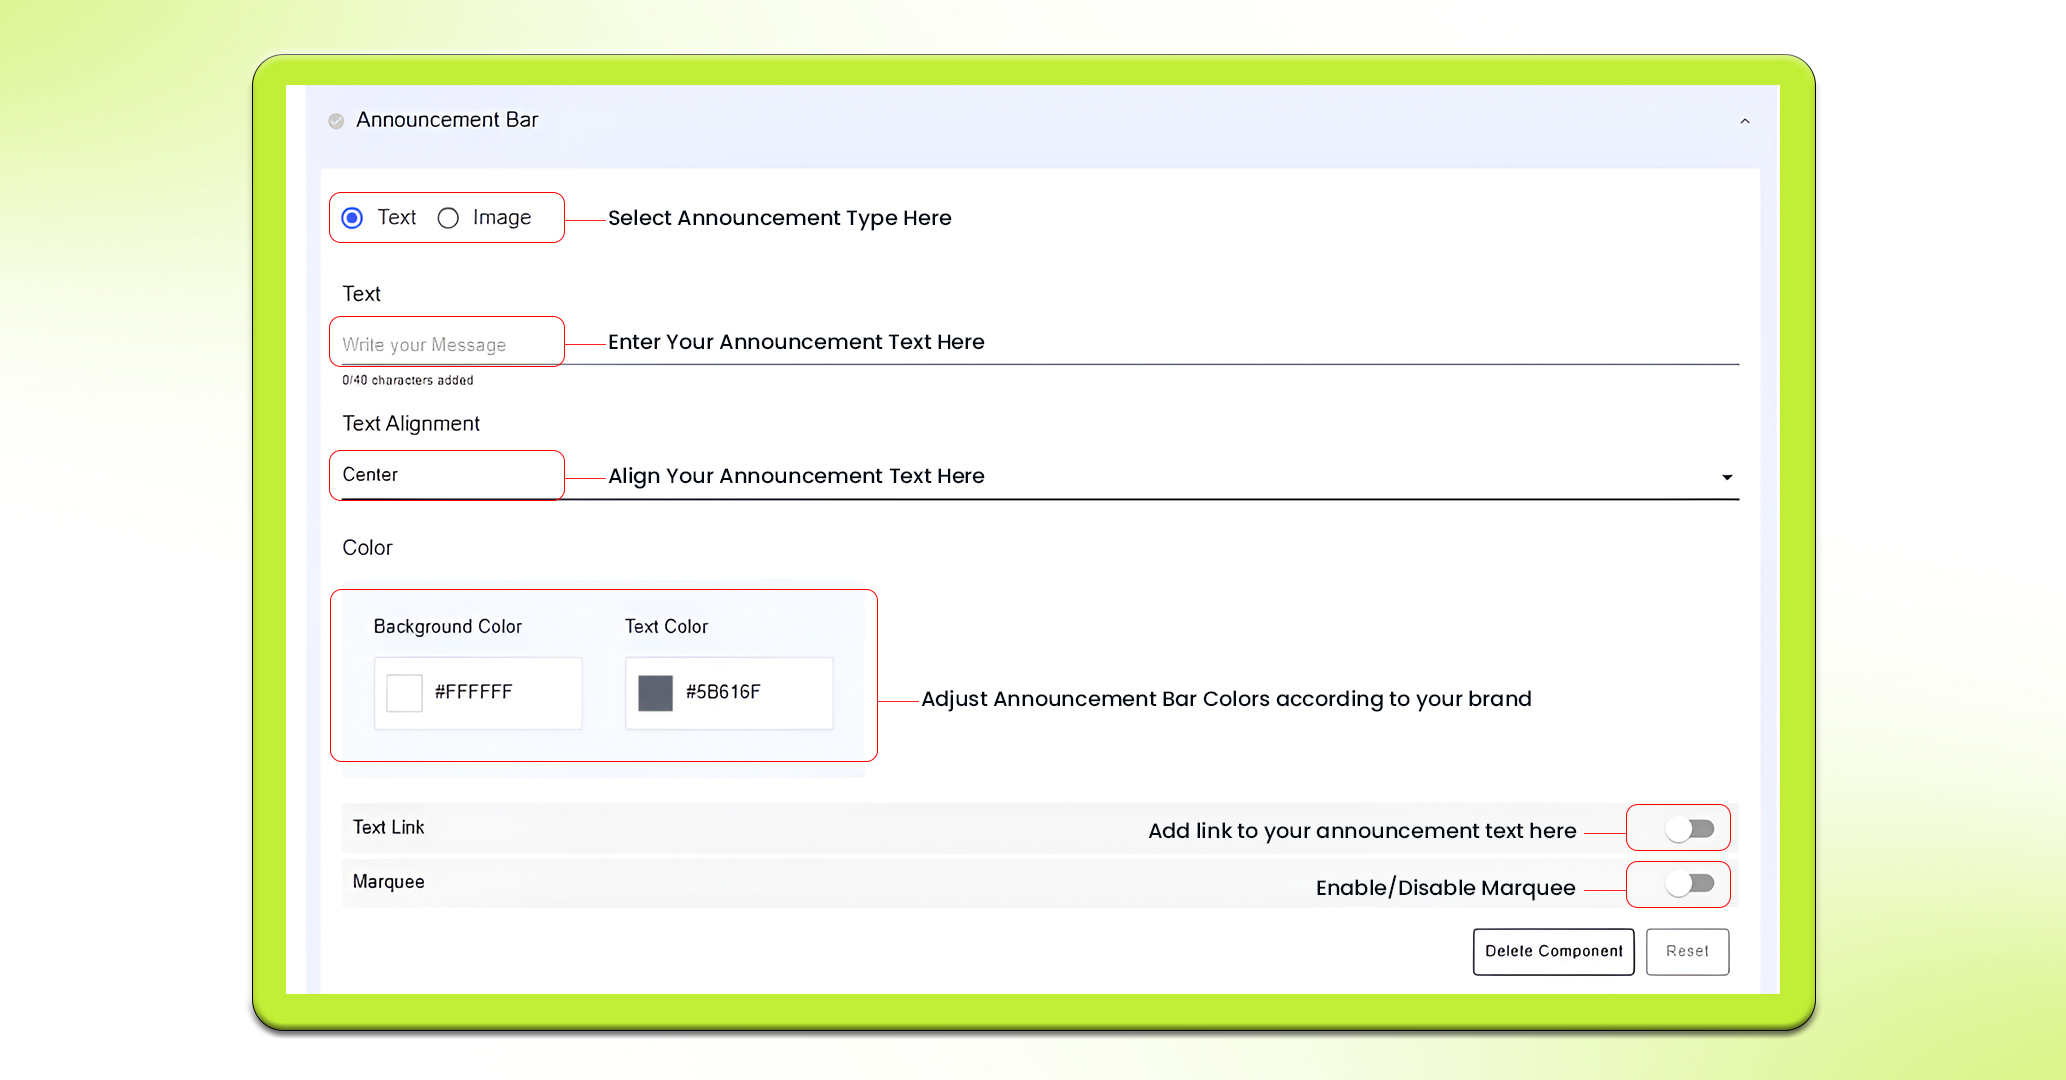
- Text: Type the text you want to announce. For example this could be a “special promotion”, or a “new arrivals” or any other important announcement.
- Text Alignment: Adjust the text alignment as you need – left, center or right.
- Color: Choose colors for the text and background. Ensure both colors are compatible with your app’s theme.
- Link: The link can be enabled or disabled as needed. If enabled, you can choose where you want to get it linked: Collection, Custom Pages, Products, and Web URL.
- Marquee: You can enable or disable the marquee as needed. If enabled, you can control the scrolling text direction (right to left or left to right) and adjust the scroll speed (1 to 10 Seconds).
5. If you want an image type announcement, Click Add Image to upload the image in png, jpg, jpeg or gif format. Recommended size to upload image is: 700x72px.
6. Once the image is uploaded, you can link them to either Collections, Custom Pages, Products, or a Web URL, depending on where you want users to navigate to.
7. After all settings are configured, click on the Save button to apply the changes.
8. If needed, you can click the Delete button to delete the Announcement Bar, or use the Reset button to clear all edits back to the default settings.
Note: Delete Component Button is only available for Custom themes and not for pre-built themes. For pre-built themes, you can hide and unhide components instead of deleting them.
Use Cases of Announcement Bar
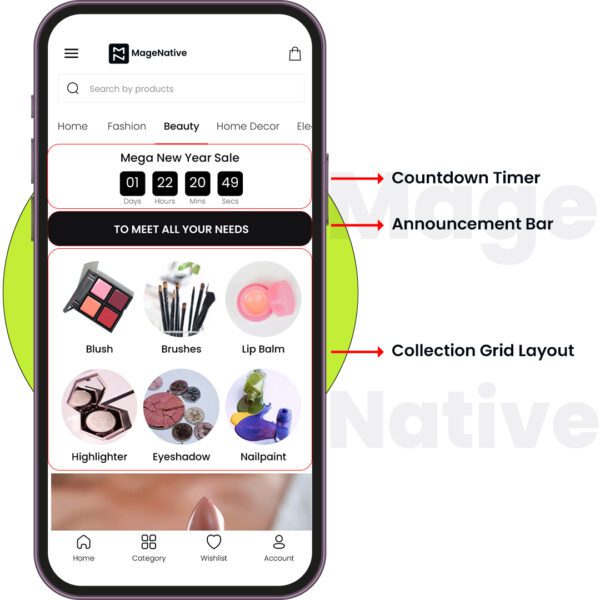
Integrating Countdown Timer within Announcement Bar
If you are running a flash sale or deal, putting the Announcement Bar and a Countdown Timer on the same page can work like wonders! Place the Announcement Bar just above the Countdown Timer. The Announcement Bar will display the promotion message, and the Countdown Timer creates urgency.
PRO TIP: Set up the Announcement Bar to redirect users to the dedicated page when tapped. This creates a seamless shopping experience.
Combining Announcement Bar with a Product Grid
You can use the Announcement Bar right above the Product Grid to spotlight certain products or deals you wish to promote. For example, if you are promoting a “Buy One, Get One Free” deal, the Announcement Bar can announce the offer, while the Product Grid below will showcase the eligible products.
Feel free to reach out to our support team if you have questions or need support. We are here to help and address any issues you may have!


